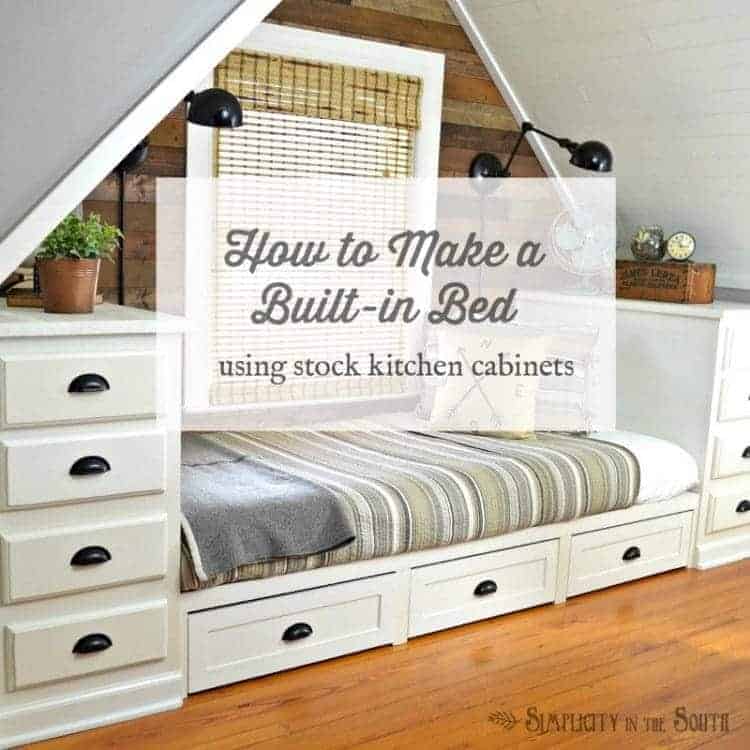
How to Make Your Own Built-in Trundle Bed and Cabinets
When we were planning the layout for our 110 square foot cottage guest shed, we wanted the end result to feel like our own tiny house.
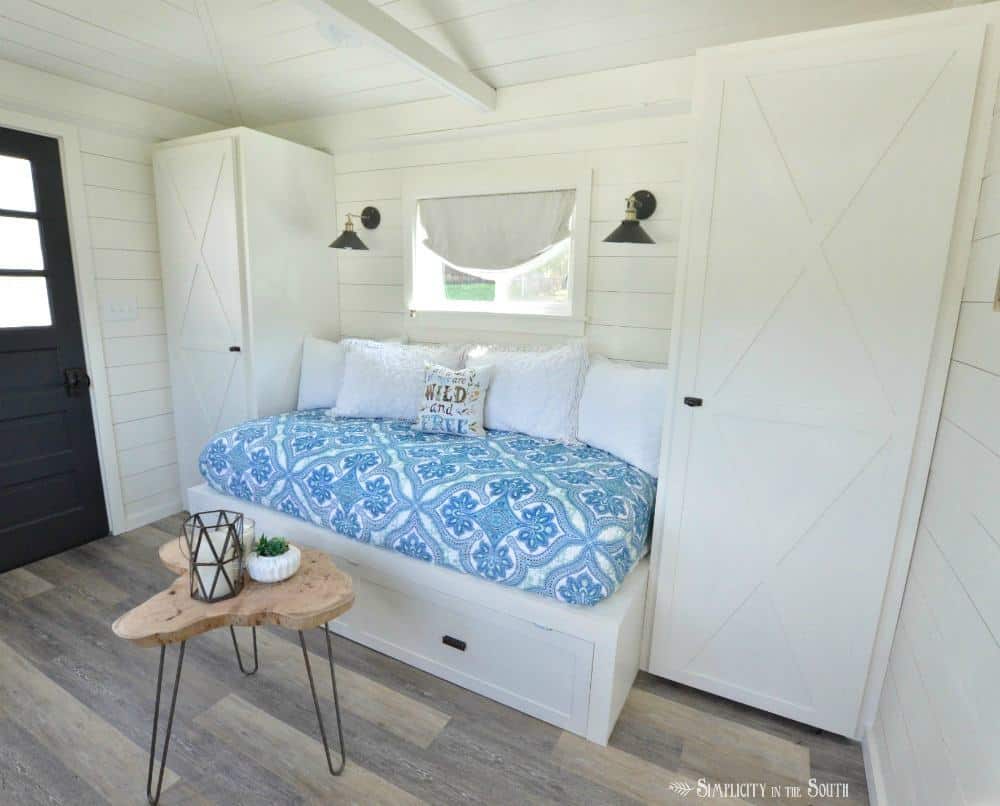
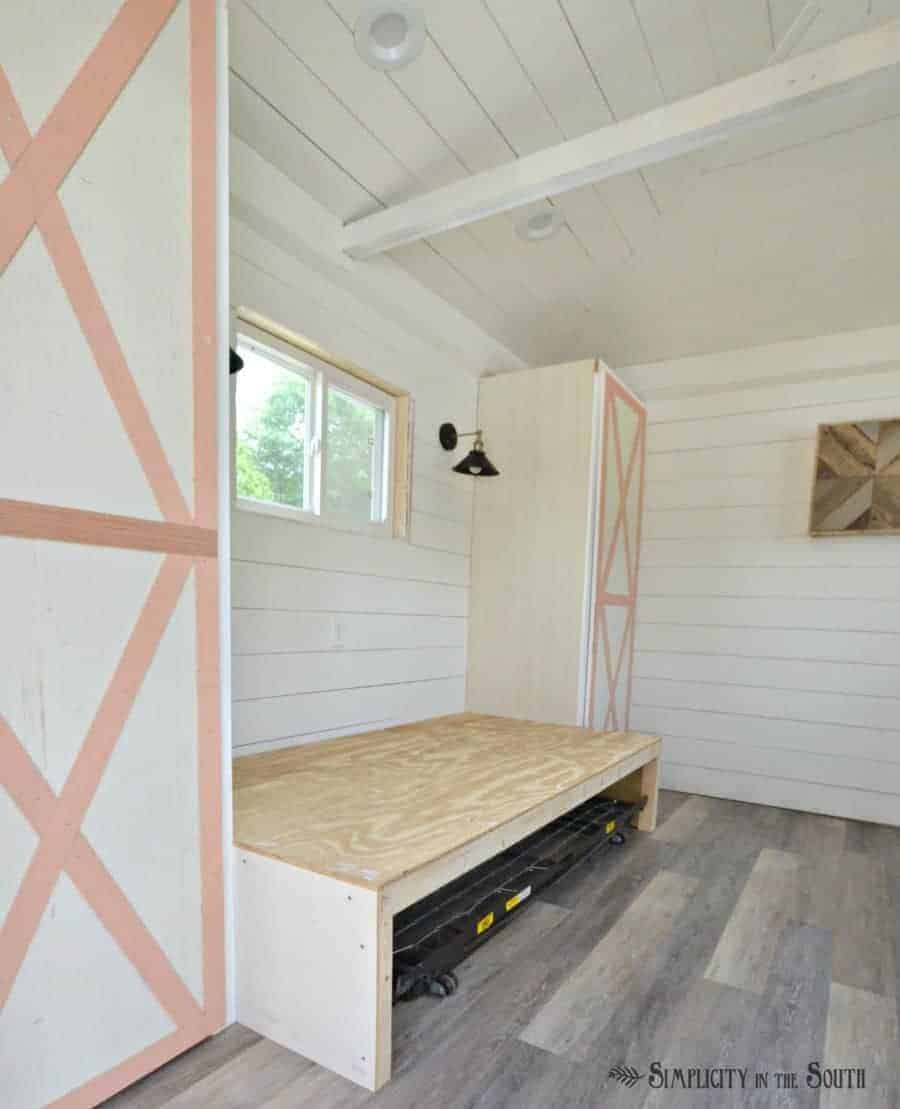
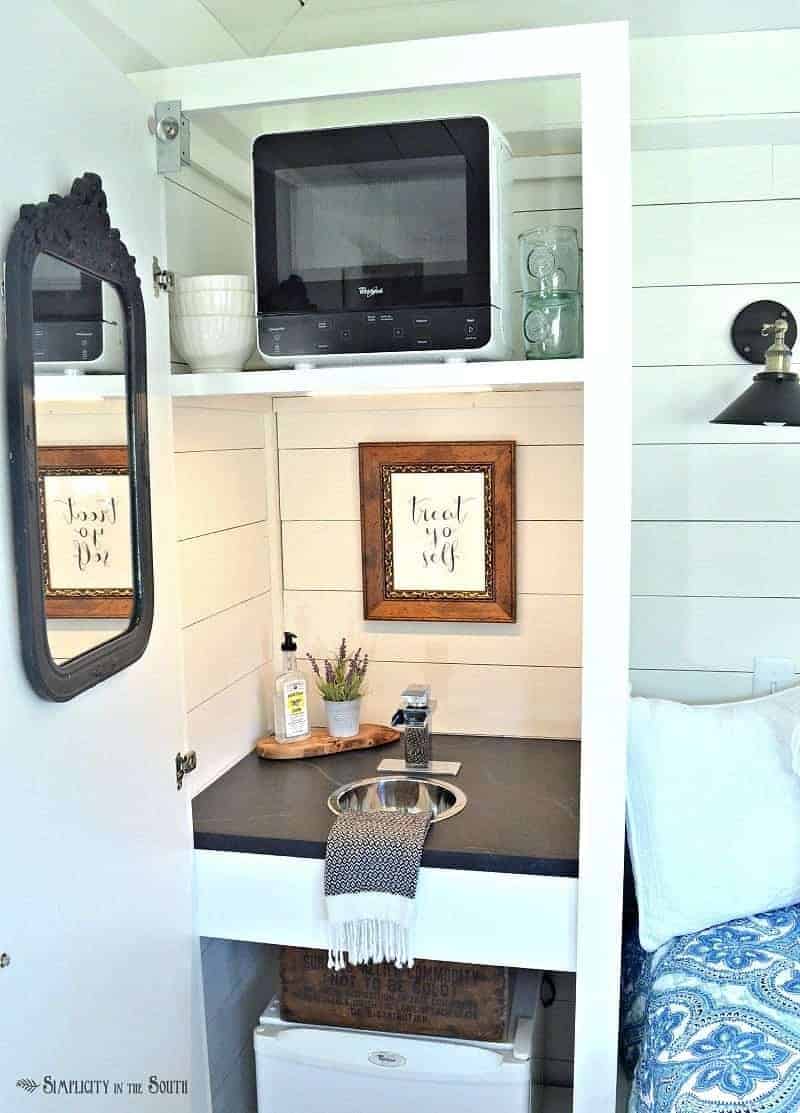
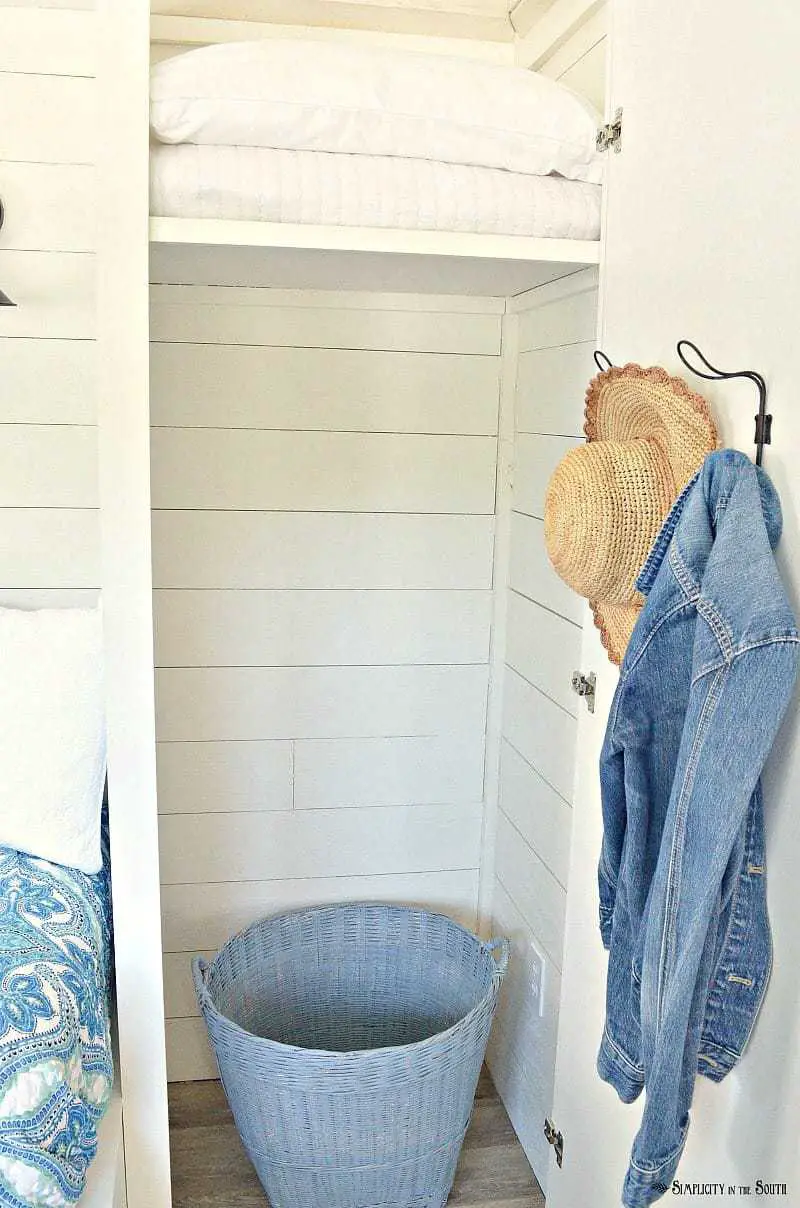
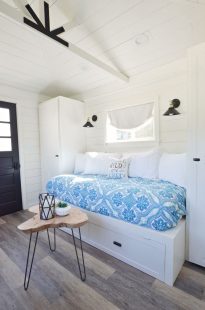
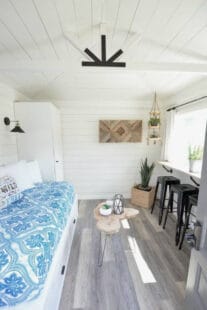
In order to do this, we knew we needed to incorporate a built-in trundle bed with cabinets on either side, much like the built-in bed and cabinets we made for my oldest son’s bedroom. This way we could fit a kitchenette, bed and closet that’ll eventually hold a toilet along the longest wall in the cottage.

We were able to make it all for less than $300.
We made this room for my stepdaughter and our parents when they come to visit. As you can imagine, my stepdaughter can be found lounging in this sweet little cottage about 75% of the time she’s here.
I don’t blame her one bit.
Update: At the end of the post, there’s a time lapse video where you can watch the cabinets being built.
In order to make the platform for the built-in trundle bed and the two cabinets, we needed the following supplies:
*affiliate links are included for convenience
- (2) sheets of 1/2″ plywood for the bed platform $70
- (2) sheets of 3/4″ birch cabinet grade plywood for the cabinets and doors $90
- (10) 2″ X 3″ boards $26
- (10) pre-primed 1″ x 3″ boards to face the bed and cabinets $45
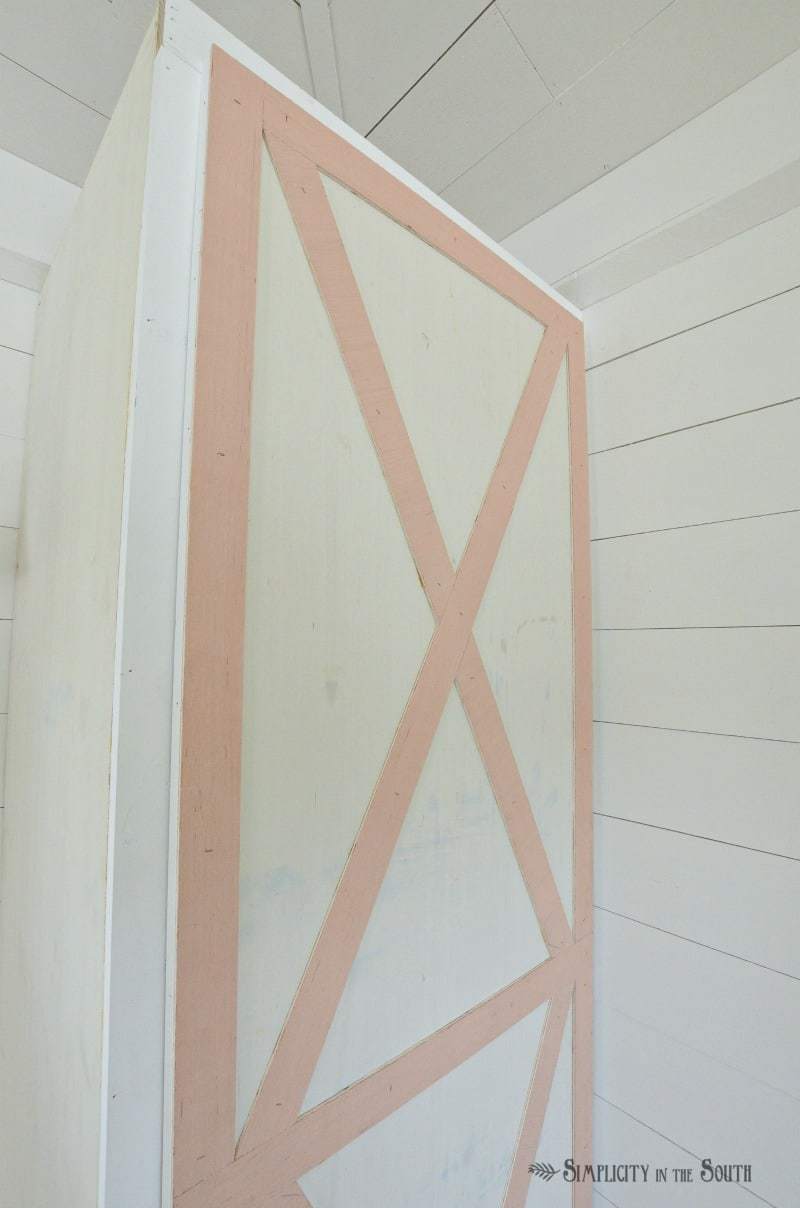
- (1/2) sheet of 1/4″ luan to make the X-detail and trim on the cabinet doors and trundle cover $13
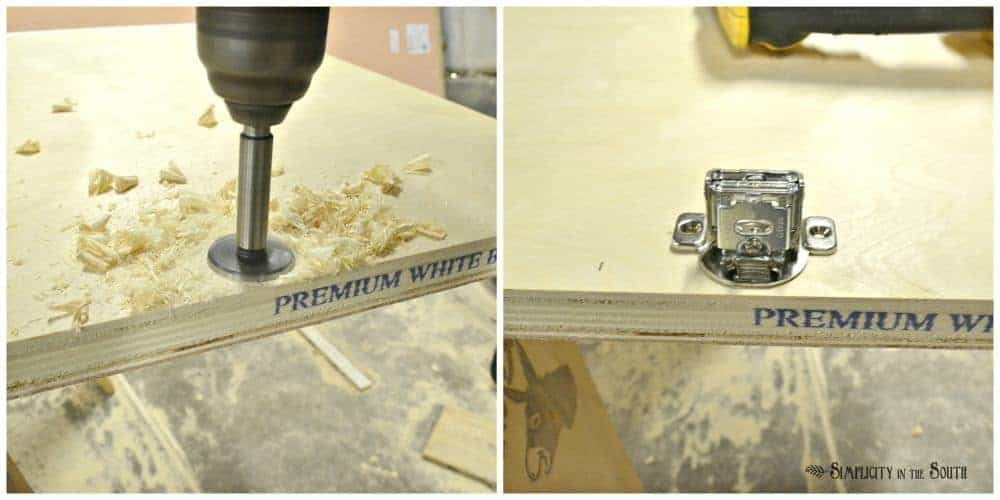
- (6) European hinges for the cabinet doors $8 (they’re on sale now for 50% off. Super deal so grab em’ up!)
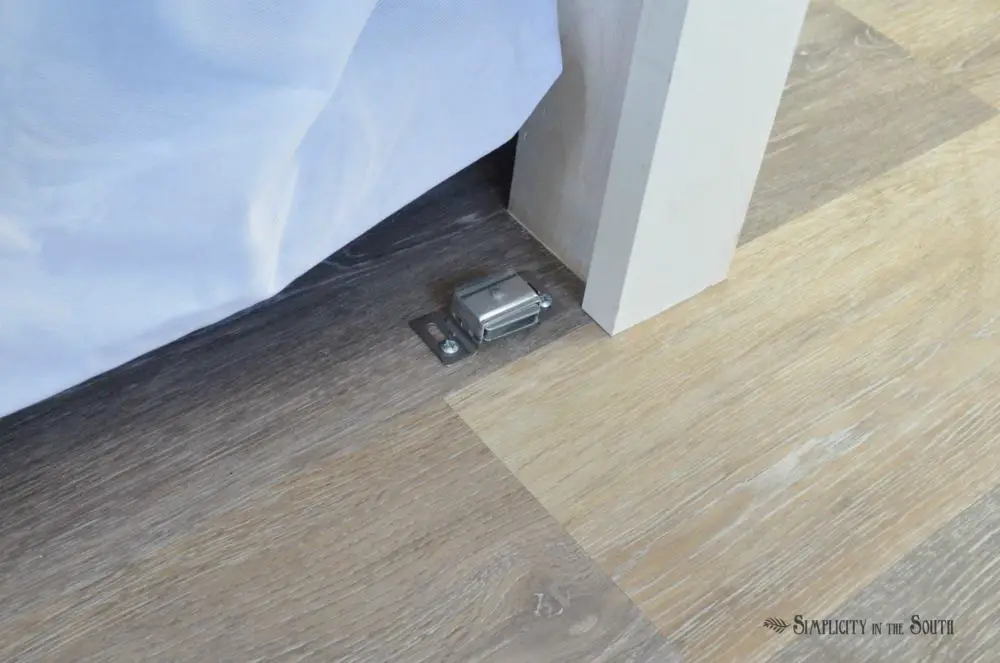
- (3) flat hinges for the trundle door beneath the bed $9
- (2) magnetic latches for the door cover $8
- Wood glue, nails, screws $25
Total: $294
We already owned the metal pop up trundle bed that fits beneath the platform bed. When the trundle is up, it makes the bed king-size. If you want to make your own slide-out trundle, you can follow these plans.
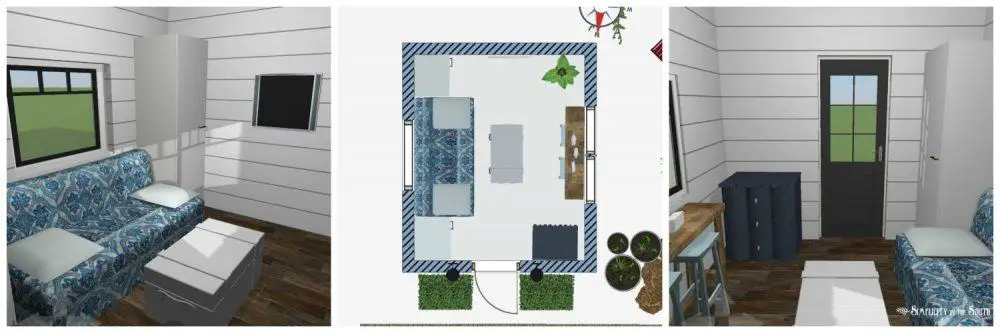
To make sure we could fit our idea of built-ins to this tiny space, I used a 3D home design app .
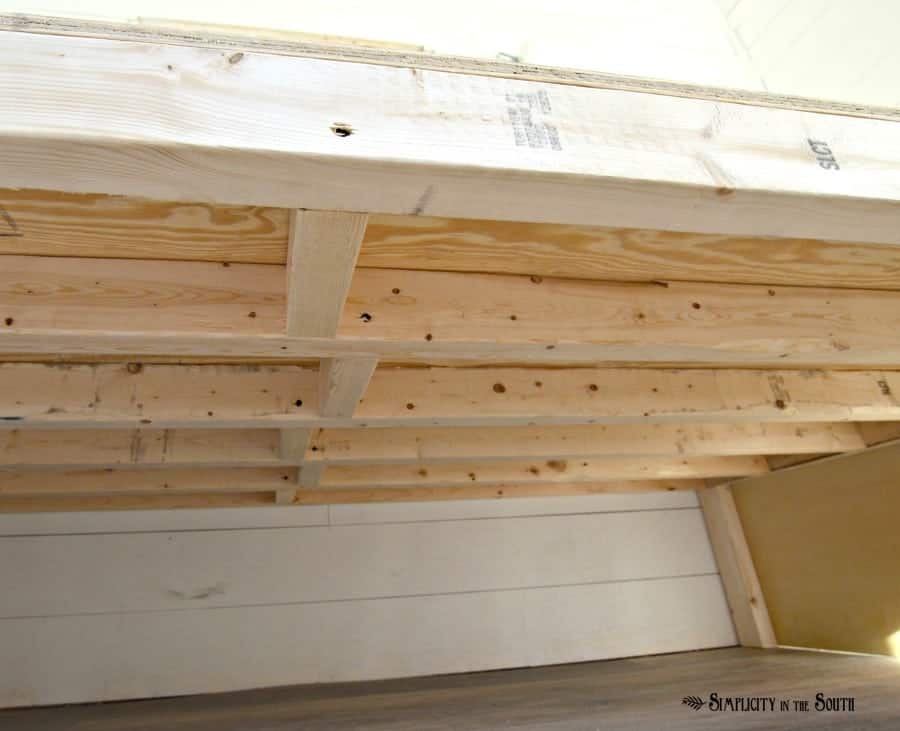
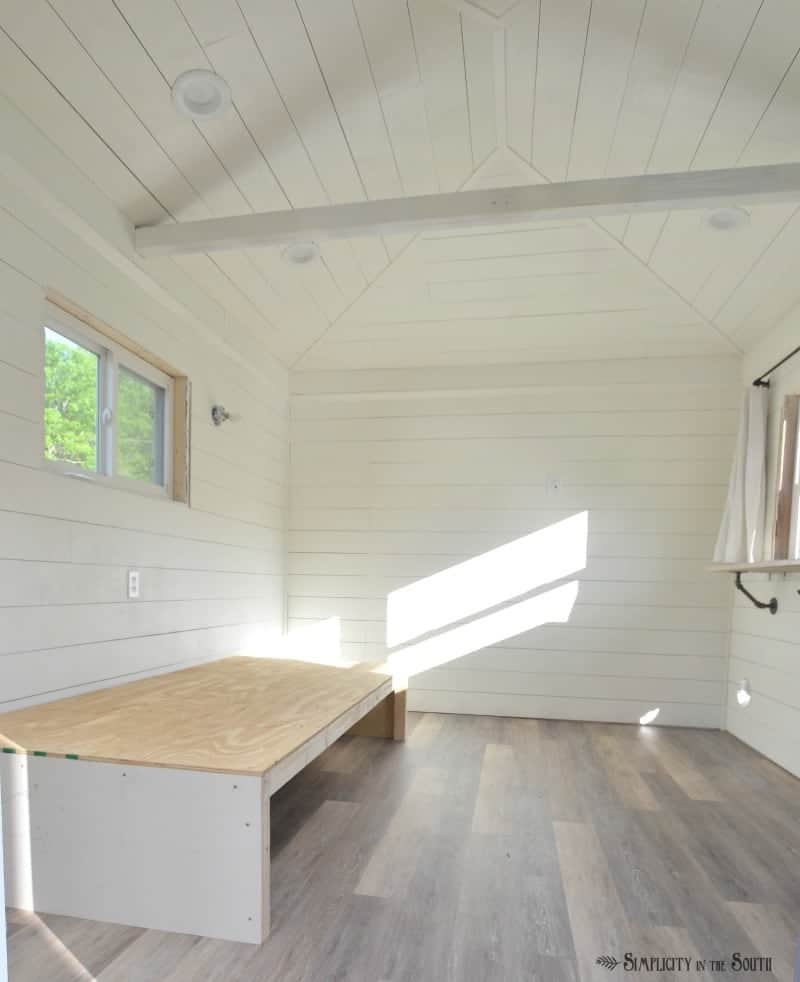
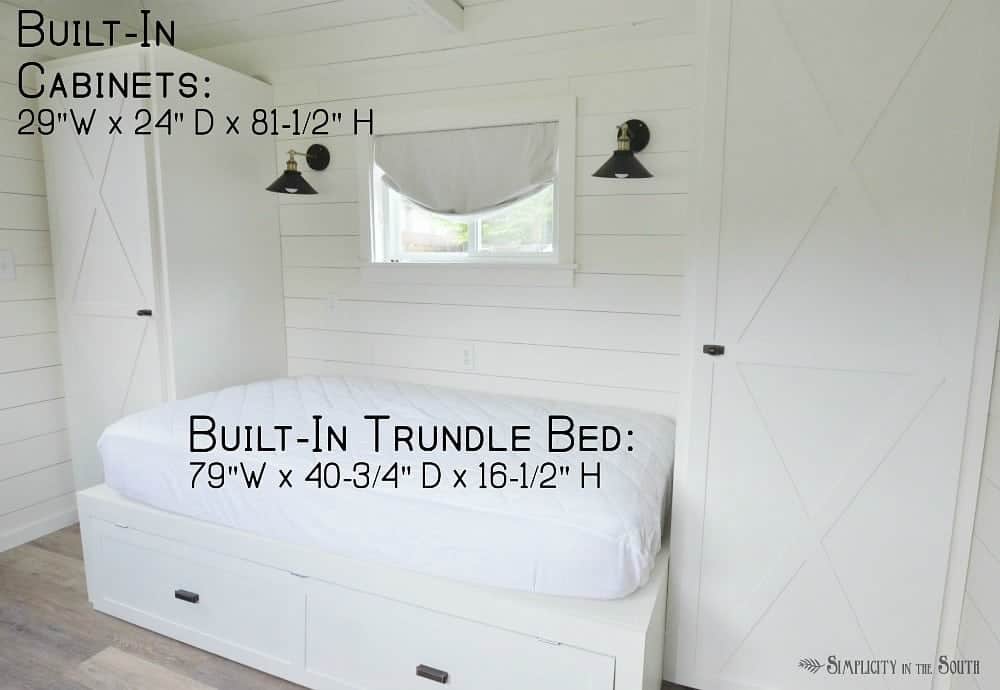
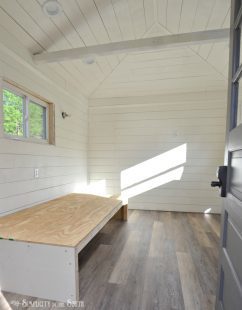
The base of the platform bed had to accommodate a popup trundle bed frame we already owned so we made the base of the bed 79″W x 40-3/4″ D x 16-1/2″H. The finished height of your bed will vary according to your mattress and trundle height. The frame of the bed was made using 2 x 3s spaced 8″ apart.
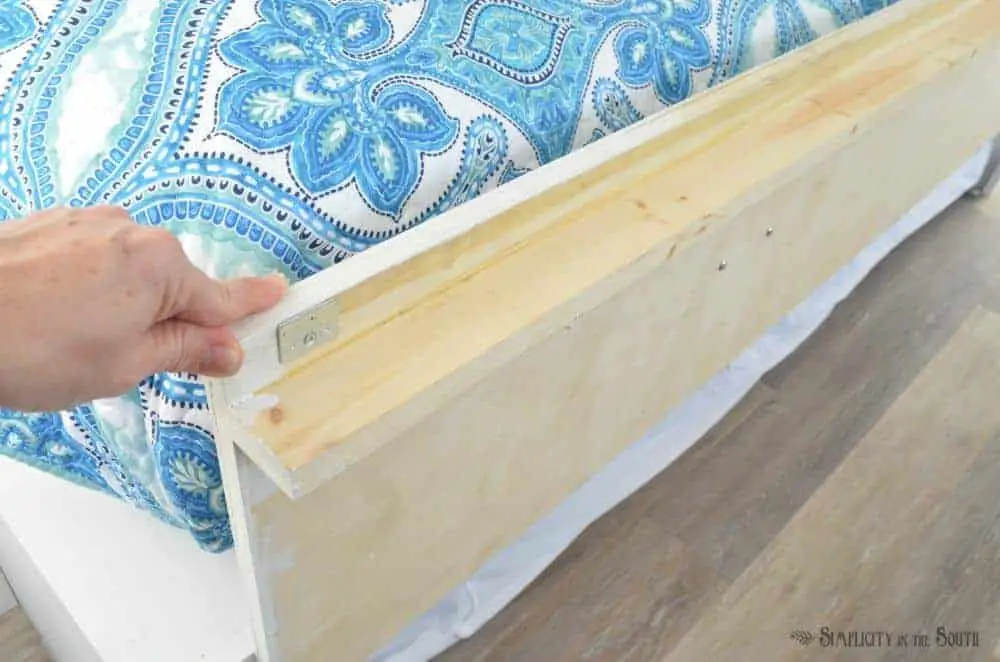
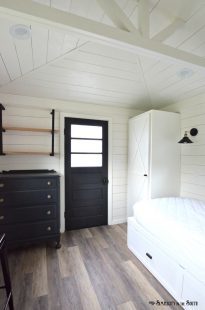
It was then covered with 1/2″ plywood on the top and 3/4″ cabinet grade birch plywood on the sides. (To allow for mattress ventilation, you can drill 1-inch holes with a paddle drill bit in the plywood top.) Later, we faced the front with pre-primed 1 x 3s.
To make the cabinets on each side of the bed, we used the same 3/4″ birch plywood. We started off by placing the sides flush with the bed frame and marking our level line. Then, we could determine the length of our horizontal supports made from ripping the 1 x 3s in half.
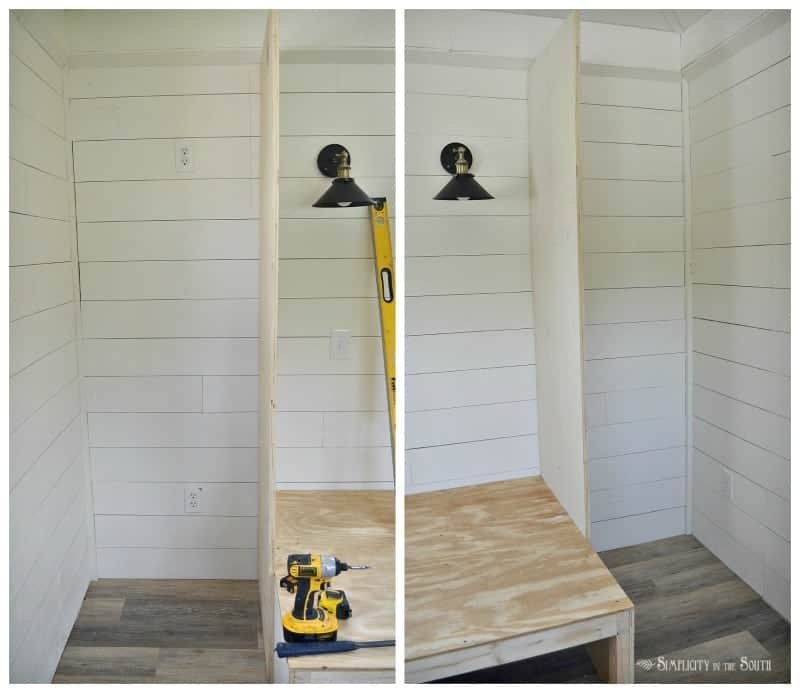
Next, the cabinet sides are screwed into the horizontal support boards at the top, where the shelves are placed, and also into the side of the bed frame. The cabinets are also trimmed out with pre-primed 1 x 3s.
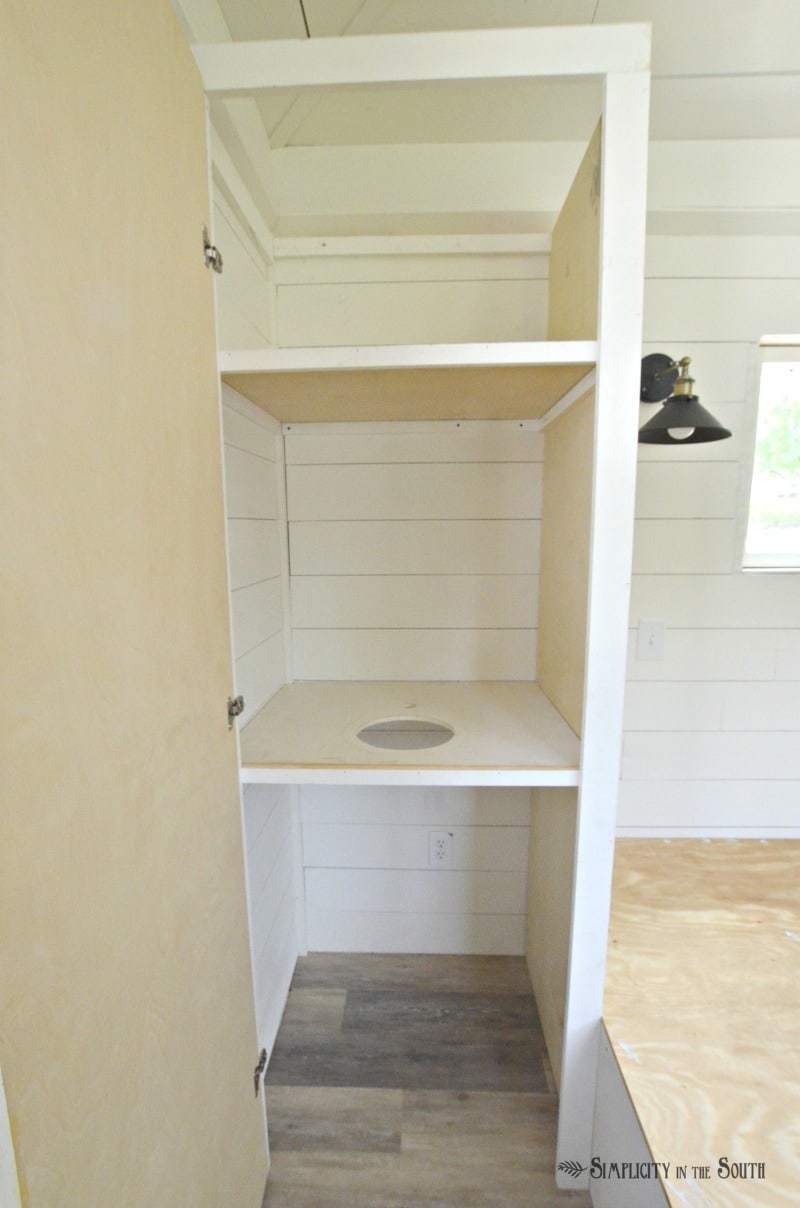
 Then, we used 1/2″ plywood for the shelves and faced them with 1-1/4″ pre-primed boards made from ripping down 1 x 3s. The cabinet on the left side of the bed got an extra shelf to accommodate the sink and faucet for the kitchenette. A platform was added later for the mini-fridge.


What about a/c and heat? What was used for that. I apologize if y’all answered this in a video but I haven’t watched them all as of yet.
Thank You.
Hi Kristina,
Thanks for stopping by! Eventually, we’ll put in a mini-split for heating and air. The ones we’re looking at are about $600-700 on Amazon and can be controlled with a phone app. Since my step-daughter stays in her cottage one or 2 nights a week, we’ve been using a portable air conditioner that vents outside through the wall. We store the AC unit in the basement when summer is over and use a space heater in the winter. I think the mini-split will be more energy efficient but we already had the portable ac unit before we remodeled the shed so we’re just waiting on it to kick the bucket. 🙂