
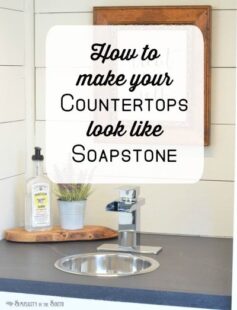
DIY Soapstone Countertops Using Paint
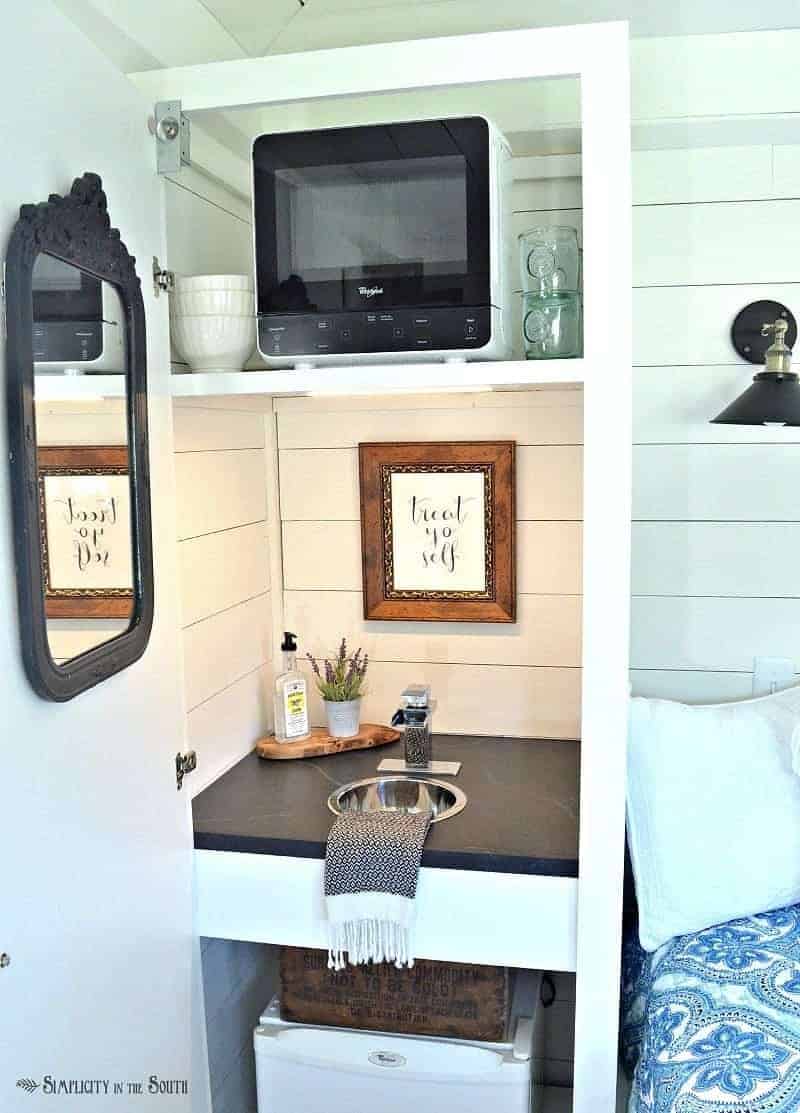
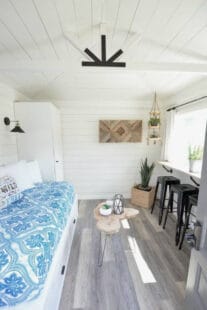
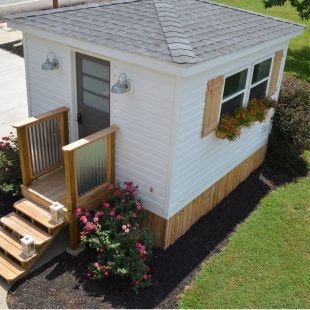
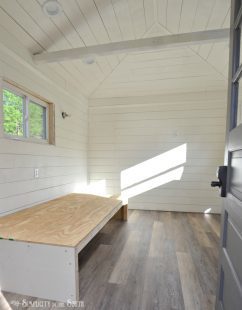
I’m a firm believer in working with what you have. I also believe that paint can work wonders. Some of my favorite projects have been paint transformations such as the Restoration Hardware inspired faux aged steel Ikea cabinet for my boys’ bedroom. We recently put a kitchenette in one of the cabinets in our cottage guest shed. We knew we wanted our kitchenette countertop to be a DIY project instead of buying one. We decided our quickest and easiest option would be to use plywood as our countertop and freshen it up by doing a quick and inexpensive faux soapstone paint technique.
I have to admit, mid-way through the process I was doubting if my unconventional technique for getting the texture of soapstone would turn out right. You’ll see what I’m talking about in just a bit. Thankfully, the stars aligned and it came out much better than I hoped it would!

What makes this faux soapstone paint treatment even more budget-friendly is that it doesn’t require any kind of special paint or wax.
Latex paint takes a good 3-4 weeks to cure, so keep that in mind before you put the countertop to heavy usage. If you already have black chalkboard paint, you can use it instead of the black latex paint that I used in this project.
*Affiliate links are included for your convenience. I only endorse products that I would recommend to a friend.

The only paint you’ll need is:
- Primer
- Black latex paint (I used Lincoln Cottage Black by Valspar. A sample pot would be enough for a small project.)
- White latex paint
**If you are painting over laminate countertops, sand them with 220 grit sandpaper, clean the surface with diluted TSP or TSP substitute, and use Glidden Gripper primer before you start.
Other supplies:
- Paint brushes (a regular paint brush, and 2 artist brushes- one fine-tipped and a flat/wide one)
- A spray bottle
- Plastic grocery bags – go ahead and tear the sides open so they lay flat
- Painter’s tape and plastic drop cloth
- Polyurethane to protect the paint finish (I used this matte varnish to mimic the look of real soapstone)
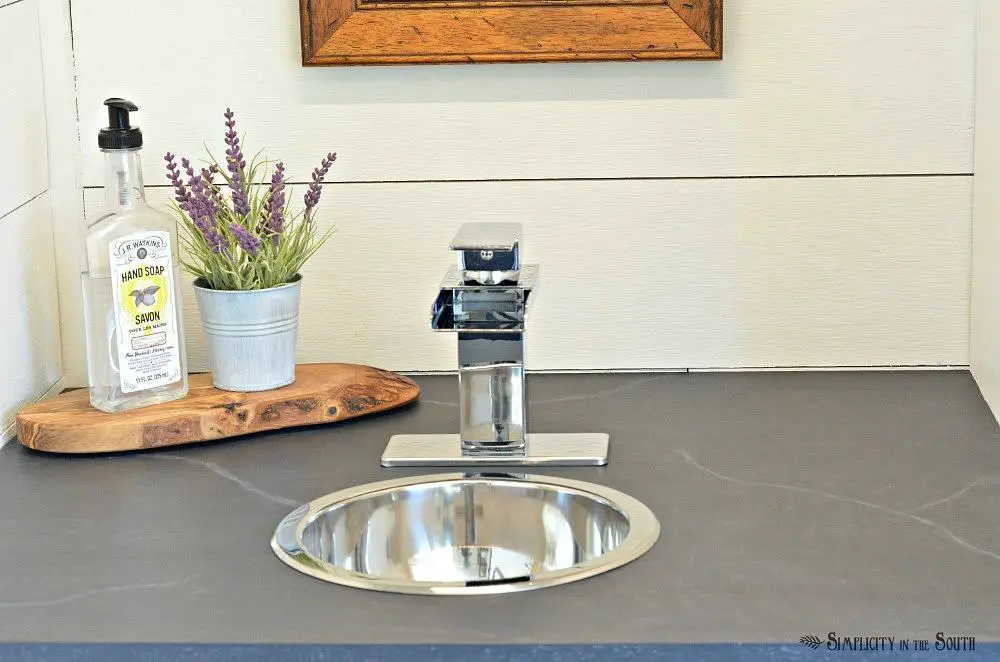
So, now I’ll show you how easy it is to get the look of soapstone at just a fraction of the cost!

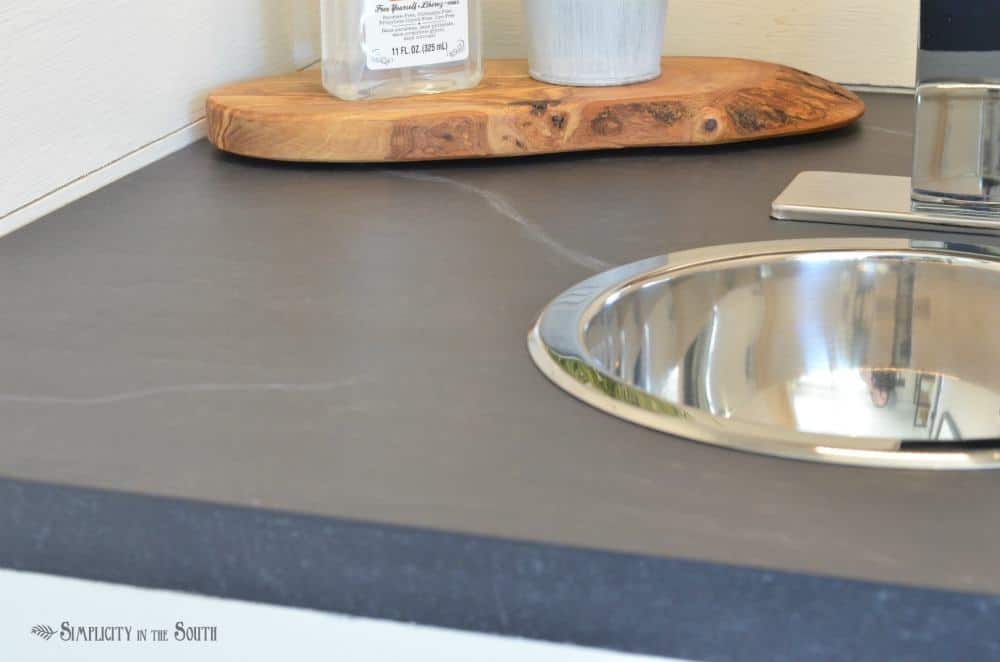
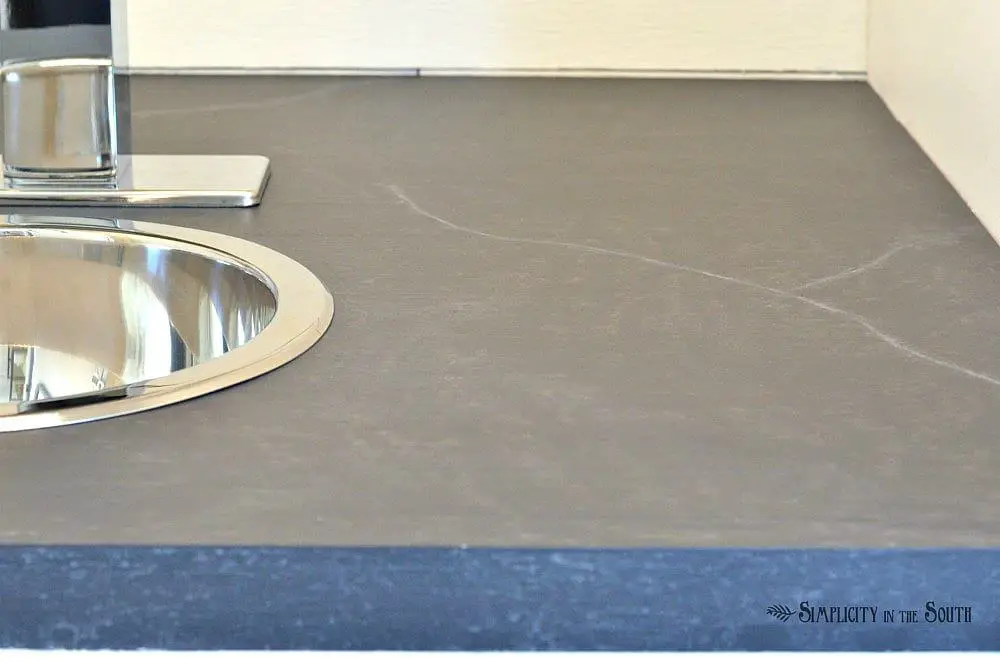
The countertops and shelves in the kitchenette cabinet are made of 1/2″ birch cabinet grade plywood. They are faced with 1″ thick boards ripped down to 1-1/4″ to hide the sides of the plywood and to give the countertop the appearance of being thicker. Soapstone countertops are typically 1-1/4″ thick.
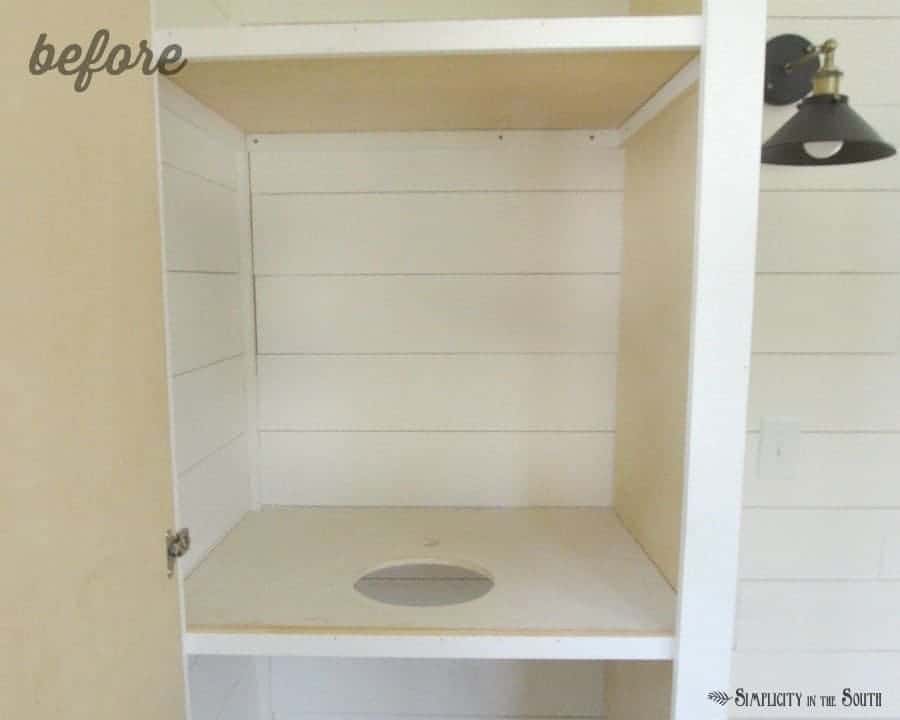 The plywood comes pre-primed on one side but I went ahead and gave it a coat of tinted primer making sure I primed all sides and around the sink and faucet opening in case it came in contact with water.
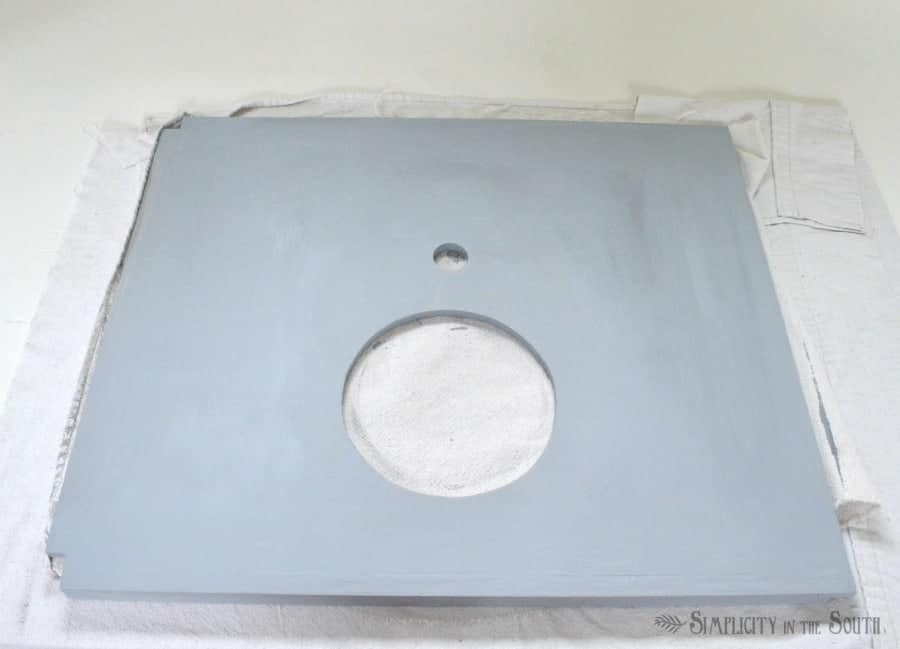
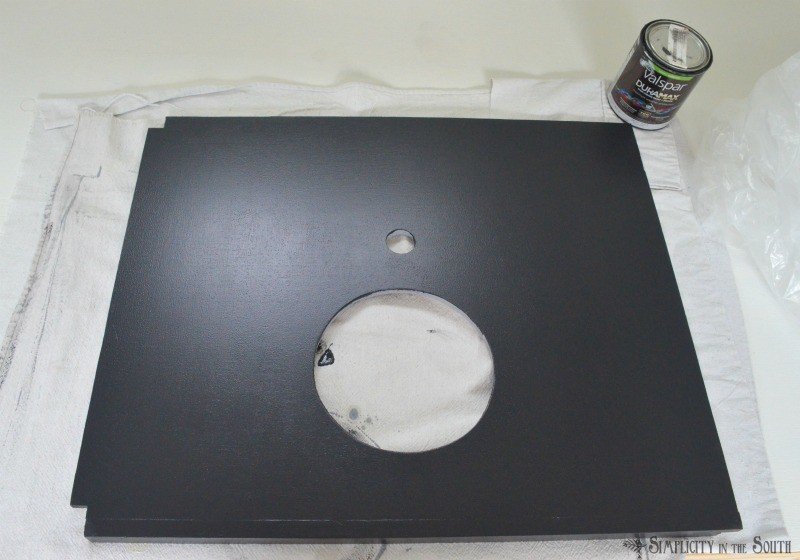
Then, I painted it with a couple coats of Lincoln Cottage Black by Valspar. I prefer this color because it has a slight grayness to it instead of being stark black.
Next, I mixed up a concoction of watery gray paint using a cup of water, a tablespoon of black paint, and a tablespoon of white paint and put it into a spray bottle.
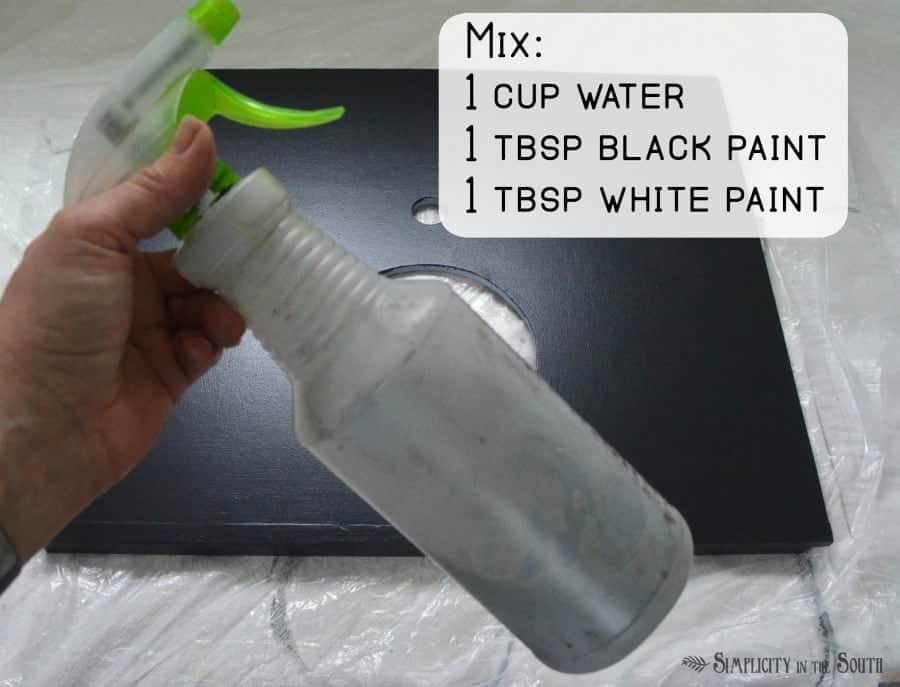
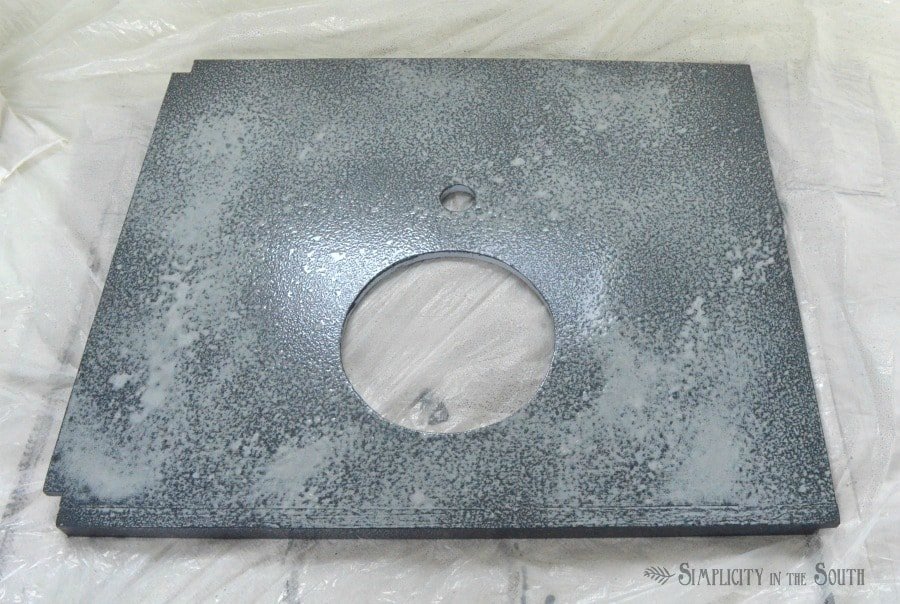
Protect the surfaces around your countertop by taping up plastic dropcloth because this part gets messy. Spray the surface lightly with the paint and water mixture.
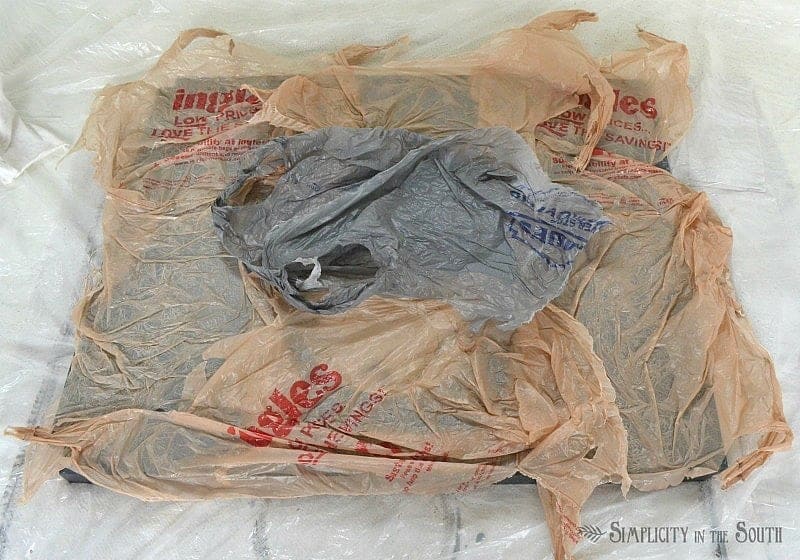
While the paint is still wet, place grocery bags on top and smooth them out with your hand. This gives the countertop the mottled texture of soapstone.
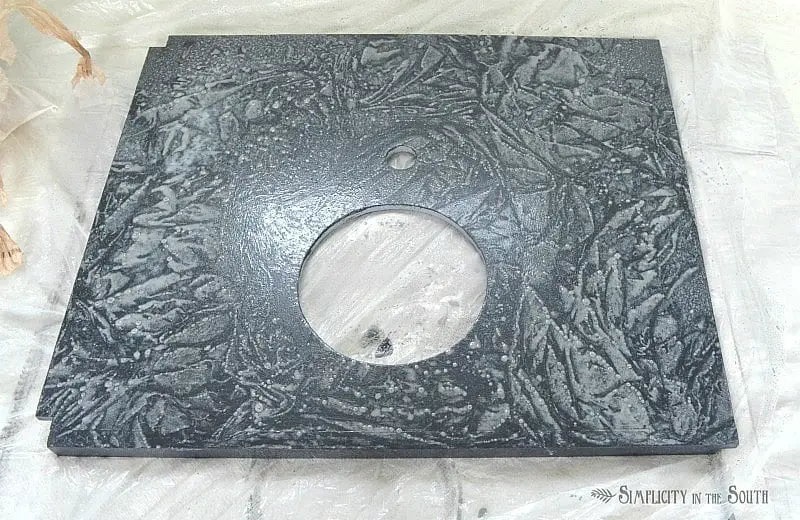
As soon as you’re done smoothing the bags, lift them off the surface. This is the part where I was doubting my idea but I promise, it all looks better after the next step.
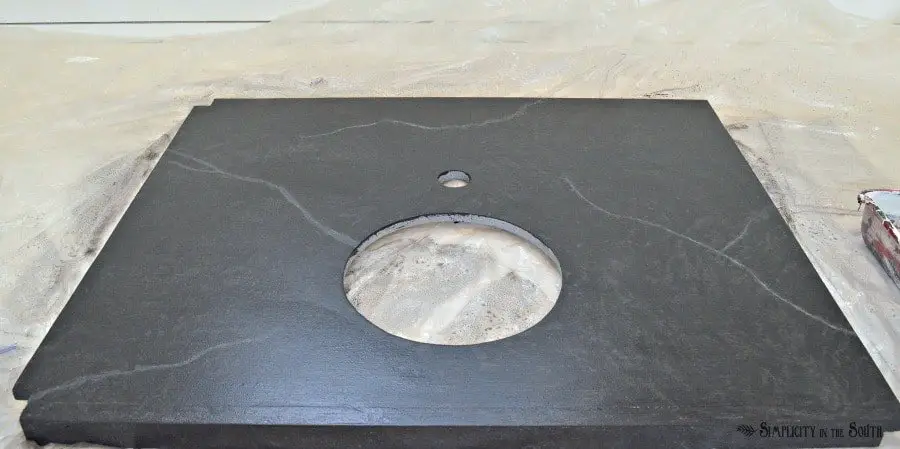
After the countertop dries, mix 1 cup of water and 1/3 cup of black paint (1:3 ratio of water and paint).
This is similar to making a whitewash so we’ll just call this a blackwash. Brush the blackwash over the entire surface of the countertop. This allows the mottled texture to be more subtle. If you need to, add a second coat.

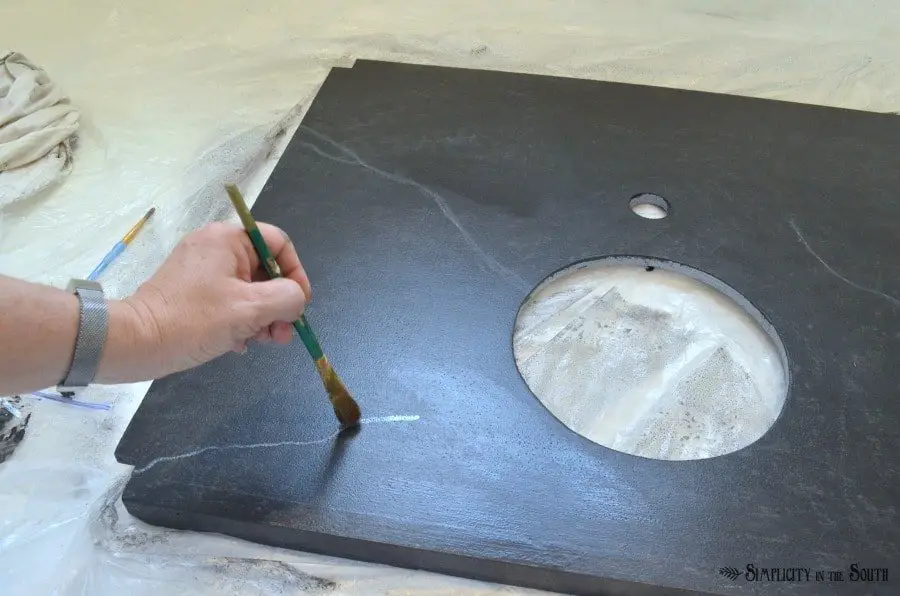
Next up, is adding the veining that soapstone naturally has. Grab your artist brushes and the watered down gray paint from your spray bottle.

;First, add your veins with the small paint brush.
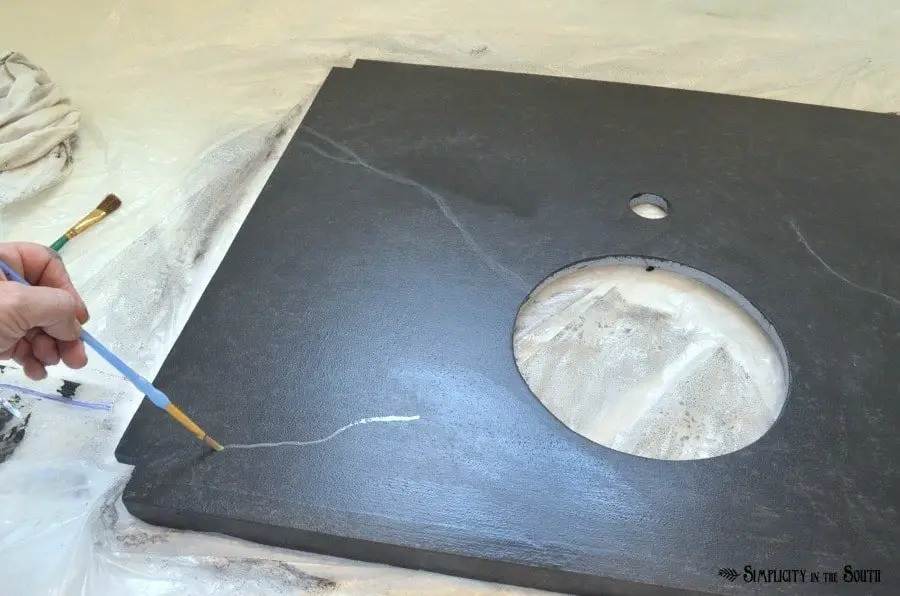
Next, soften the edges with the dry wide/flat brush by lightly pouncing over the lines.
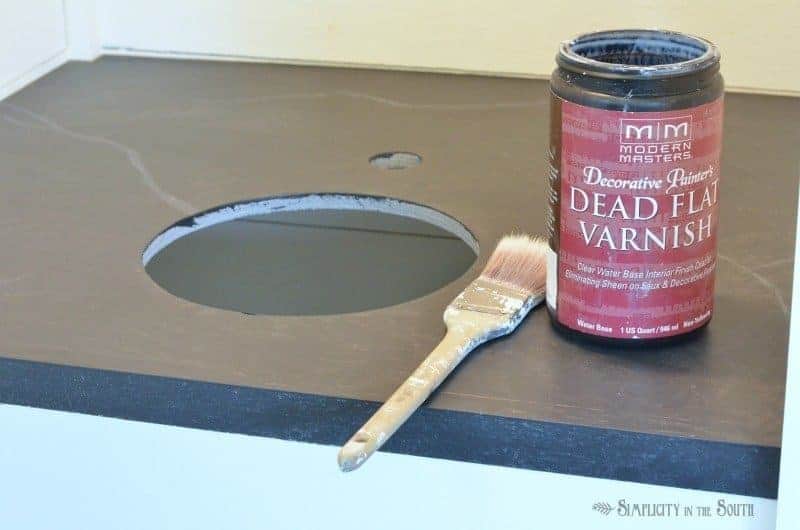
Give your countertop 24 hours to dry and then protect it with polyurethane or my new favorite, Modern Masters Dead Flat Varnish. It gives the surface protection without brush strokes or sheen which makes it look more like real soapstone. You also don’t get the bluish tint that poly can give even after it dries on dark paint.

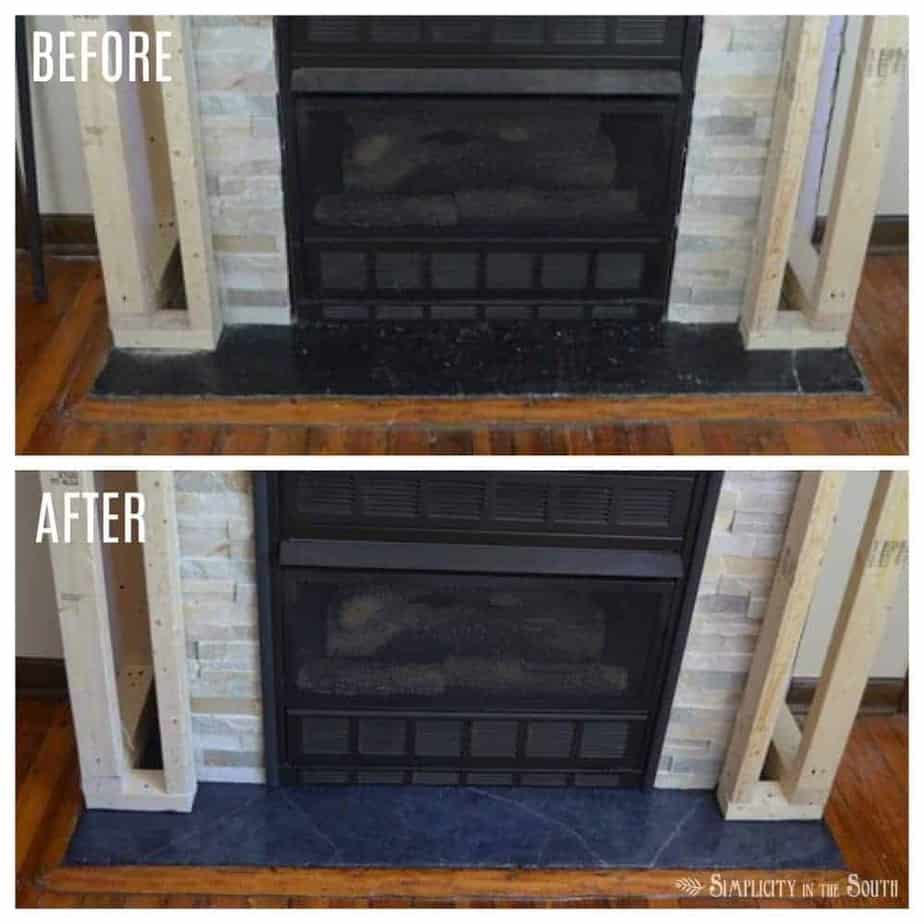
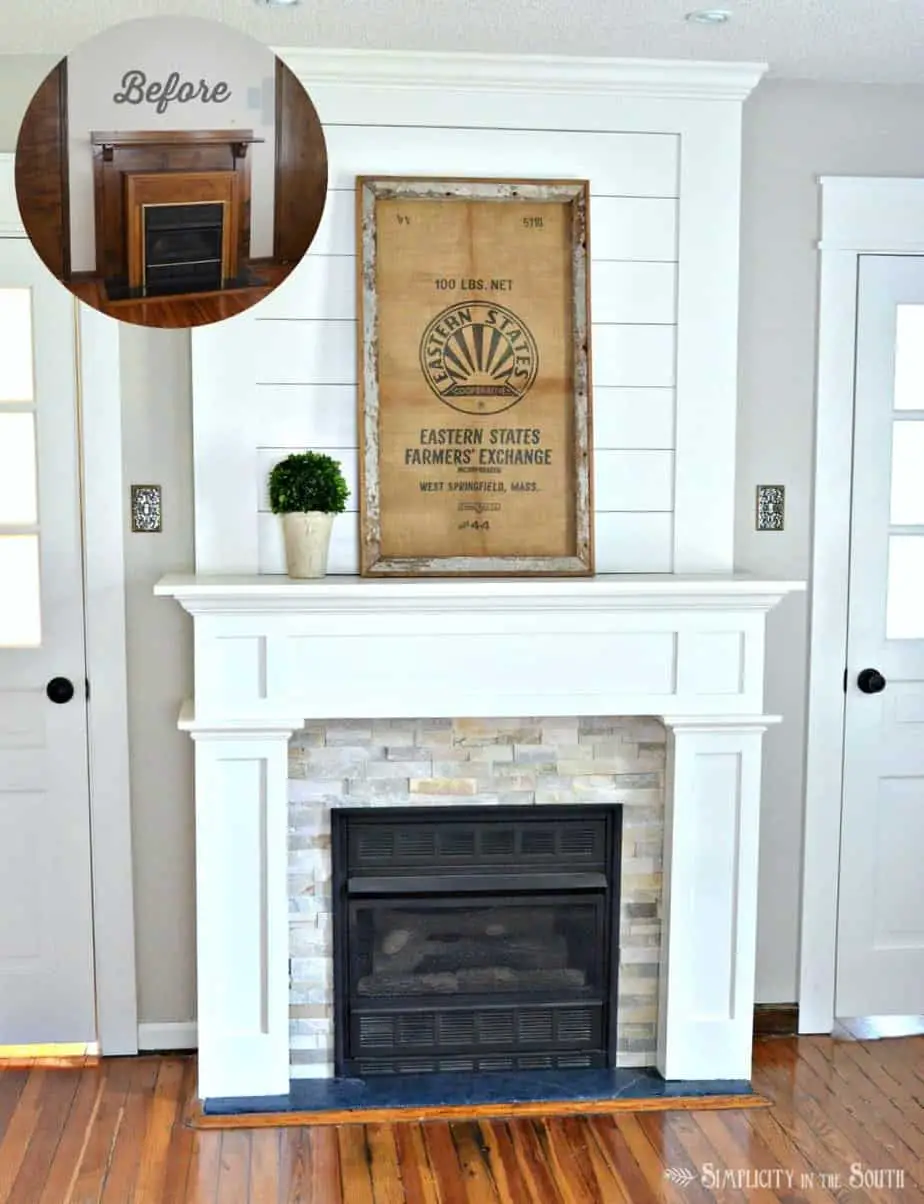
I used a similar paint technique on our master bedroom fireplace hearth. The only difference was I sponged on the watered down gray paint and protected it with satin Varathane polyurethane made for floors. Before I painted over the existing glossy paint, I lightly sanded it with 220 grit sandpaper and cleaned it with diluted TSP substitute.
I’d love to hear where you’d use a faux soapstone paint finish!
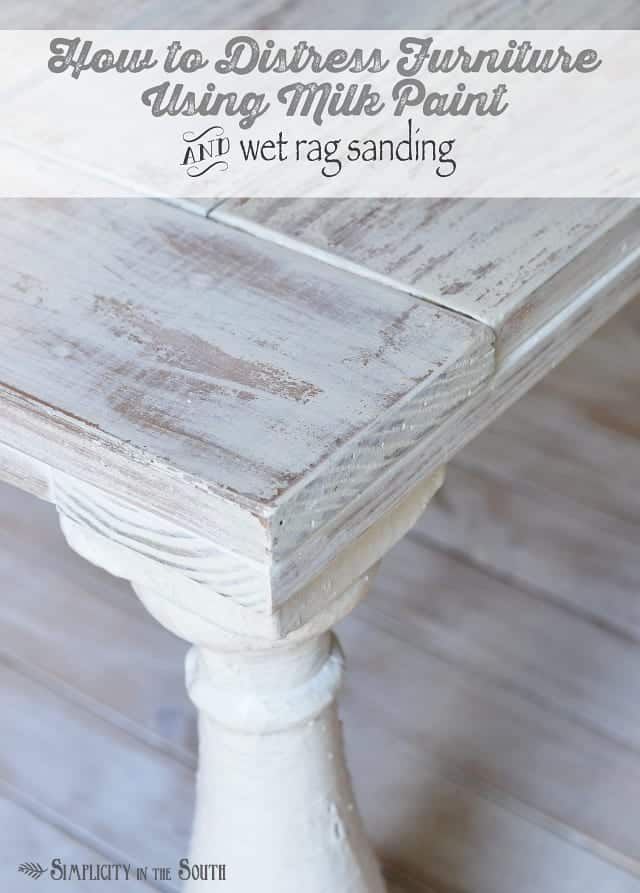
If you love trying out new paint techniques, I’m betting you’ll love these posts:
How to Distress Furniture Using Milk Paint & Wet Rag Sanding
Restoration Hardware Inspired Faux Aged Steel Ikea Cabinet


I used your technique for soap stone on a bar cabinet top. We love it. I wish I could share the photo, but don’t believe I have that option.
Thank you for the inspiration.
Kevin
How does this finish hold up with something hot placed on it.
Hi Lisa,
We haven’t placed anything hot on the countertop but I would use a trivet or a hot pad to protect it. I hope that helps and thanks for stopping by!
Tricia
I used your technique on my ugly office space laminate and now it is gorgeous soapstone look. Thank you so much. I wish I could post a picture. It looks so good I am truly amazed. I am gonna throw caution to the wind and try a career marble look for my vanity next.
This is the closest to faux soapstone I have seen so far from anyone. I will be making my concrete countertops and using an epoxy that would be honed to lower sheen from Stone Coat countertops to protect and finish. Although they do show techniques to imitate soapstone, I want to use your techniques to test how it would work for the way I plan to do mine. I am with you up till you mention “smoothing the plastic grocery bags”. Is this just pushing air from under the bag after placing it or trying to get the wrinkles of the bag smoothed out? I assume you aren’t overdoing this so as to not just smear the paints. Since the bags are small, are you reusing the same bag or keep using new bags for large spaces? I realize I will need to test on small test boards but prefer to not waste a bunch of materials because I didn’t understand this step.
How has this counter top make over held up?! I’m dying to try this in my kitchen. Just wanting to know how durable its going to be! Thank you!!
You’re welcome! I love hearing that you might give this a try in your kitchen. They’ve held up really well with no chips or scratches but these countertops don’t get used every day. The important thing is using a good sealer. Good luck with your project!
This is the best faux capstone technique I’ve found.I’m doing it on my countertops even as i write! Thanks for the free knowledge!!
Thank you so much! I’m glad it was helpful and good luck with your faux soapstone project 😊
Are these products food safe? I would love to do this in my kitchen but I am a cook and a baker. My kitchen gets lots of use.
Hi Julie,
Thanks so much for stopping by! I’m excited you might be trying this technique for your own kitchen. Finding a paint sealer that can withstand daily use in a kitchen and also be food-safe is a tough one. The water-based matte sealer I used from Modern Masters is water-resistant / abrasion-resistant and has held up in the cottage but doesn’t get much use. In our pantry, we used a 3-part epoxy that is food safe, super durable and able to be tinted but it was used over concrete. I’ve been using Daddy Vans All Natural Beeswax a lot lately. It would definitely be food-safe and give water-resistance but would have to be reapplied often and wouldn’t give much scratch resistance. I wish I could be more help!
Tricia
Hi
I’ve just used your technique to do my ugly brown laminate office space countertop over into an amazing soapstone work of art. I am really worried the thinned layex veining will smear when I put the poly on. I have bought Behr polyurethane in a matte finish for topcoat. I also have wax that I could use as an alternative. I will leave it at least 2 days before topcoating. I plan on using a brush but someone online recommends a slightly dampened sponge. Any thoughts? Do you think the Behr will be ok, without smearing the paint or having whitish streaks? Thoughts?
I am so WOWOWOWOW’d – and I could spend hours reading all of these tips and DIY projects – makes me want to get busy!!! Thanks for sharing <3
I love it! Great idea for the texture! Your home is so beautiful!!