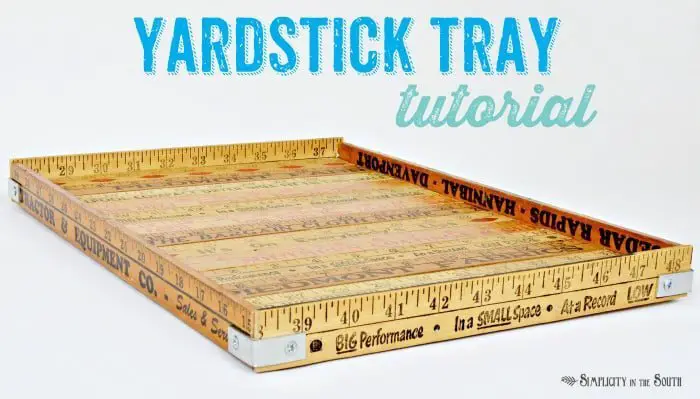
Vintage Yardstick Tray
First of all, I’d like to send out a huge thank you to Rhoda of Southern Hospitality for sharing a tour of my home this morning!
Sometimes I find something so inspiring in blogland, I feel like I need to make it the same day. Then, there are times that it takes me…oh, about a year.
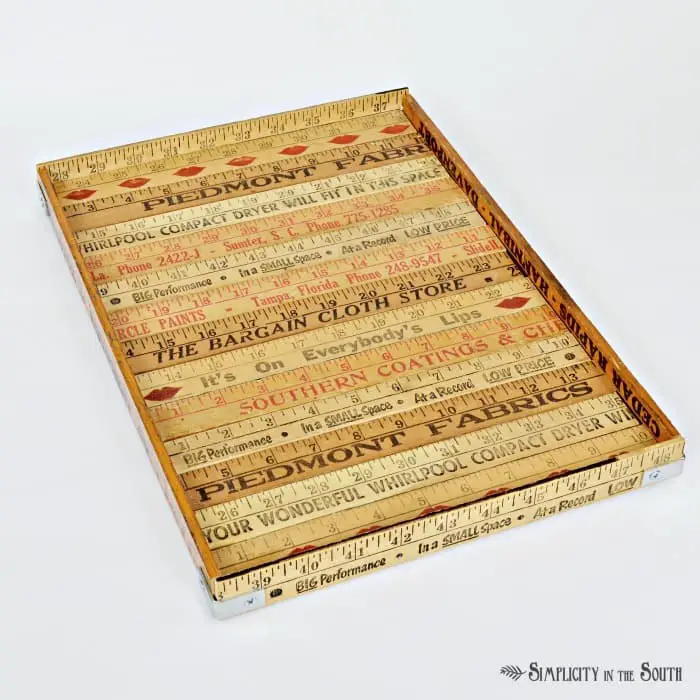
I’ve been wanting to make a yardstick tray ever since I saw the one that Susan from Between Naps on the Porch spied at Ballard Designs Outlet back in March of 2012. Yardsticks aren’t as easy to find as I had hoped. I found a couple in the Habitat for Humanity store and bought the rest on Etsy and Ebay.
So, here we are, a year later with the tray finally done and another project marked off the list!
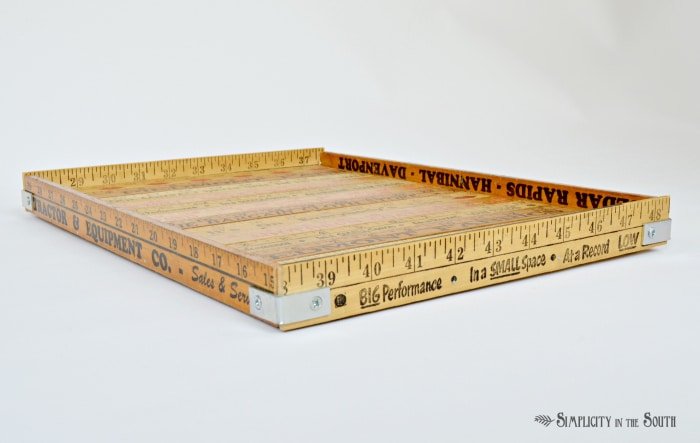
As with most of my projects, I start off with a plan and then have to pause, rewind, delete and change it around a little. As you can see in the picture below, I decided not to use the handles. Why cover up the vintage advertising? That’s my favorite part. I also ended up using one inch corner braces instead of half inch and four clamps instead of two.
But it all turned out fine at the end.
Well, sort of. You’ll see.
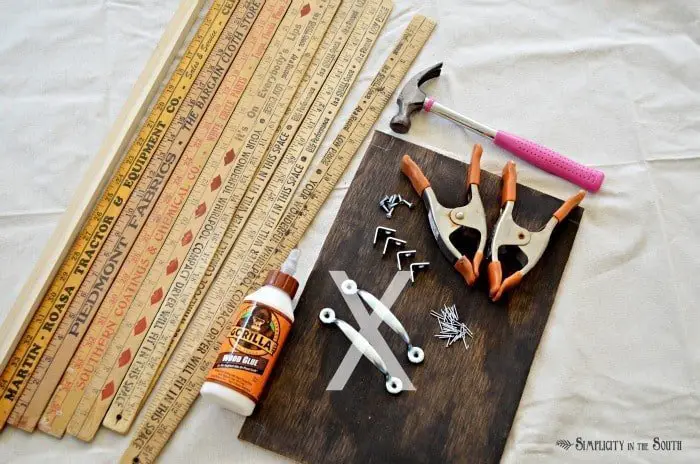
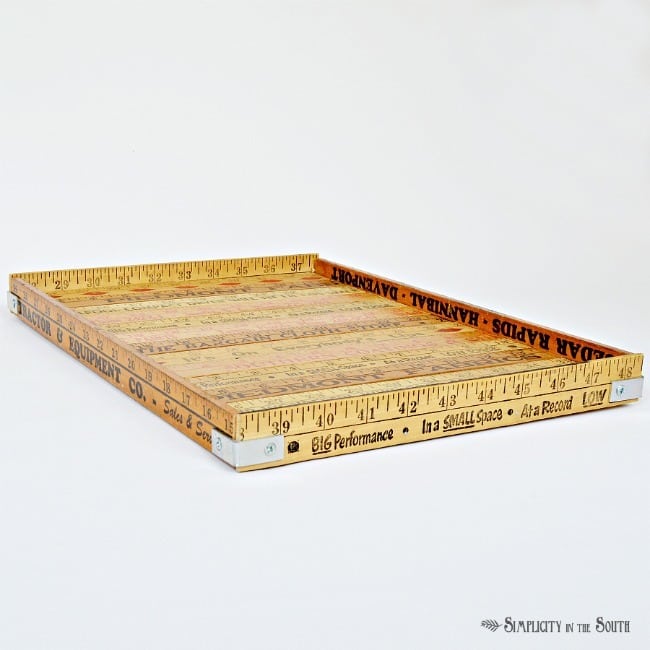
In the spirit of being thrifty and working with what I had, I started with a piece of 1/2 inch plywood and had my husband cut it down to 10.5 inches by 15 inches. For some reason, I still won’t go within 10 feet of the table saw.
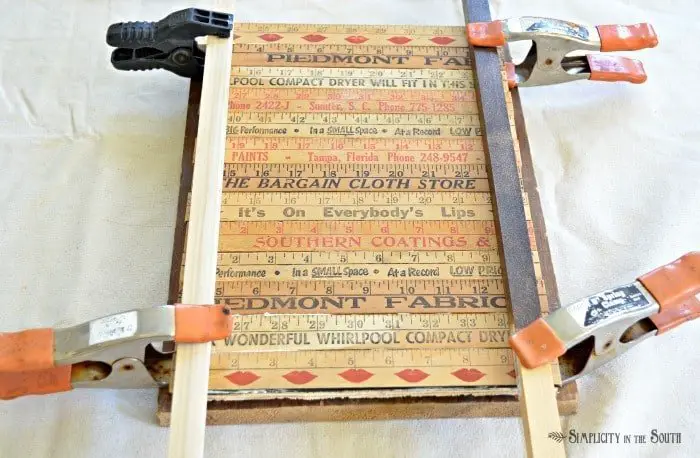
I cut the yardsticks the width of the board and used wood glue to attach them to the board. Then, I clamped them using some scrap pieces of wood. The clamps will squeeze out some excess glue so you’ll have to take the clamps off, wipe the tray with a damp cloth then reapply the clamps.
After the glue dried, I cut the side pieces and used wood glue and brad nails to attach them to the plywood base. I sealed the top of the tray with a coat of Annie Sloan Clear Wax but you could you use polyurethane. The corner braces are really just to give it a more industrial look.
And speaking of looks…
I didn’t realize how crooked the tray turned out until I looked at the pictures. I’m guessing the board was a little warped from sitting in our building for so long.
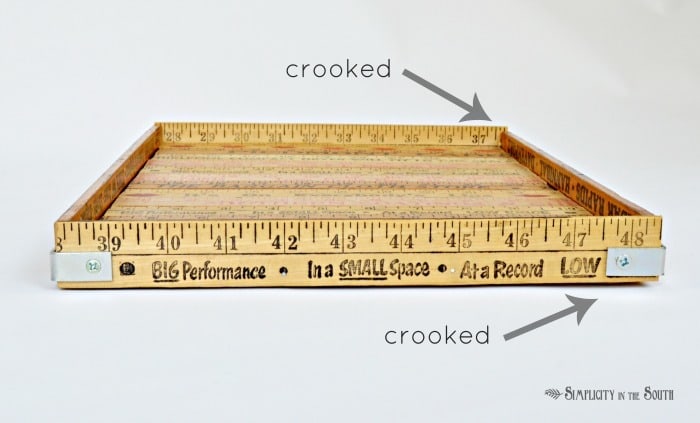
But I still love it, imperfections and all.
Sometimes, just getting a project completed is more important than getting it perfect. Don’t you agree?

Why’d You Steal Our Garbage could have dreamed of back again-ups can help to make sure the site of quality but remarkable savings
as well. Writers candy crush saga hack who develop their own recreation.
If you are seeking.
Thanks , I have recently been looking for info about this subject for
a long time and yours is the best I’ve found
out till now. But, what in regards to the bottom line?
Are you sure in regards to the source?
wow super cute! I love this tray!!!
love, loving your yardstick tray. I love the industrial look with the braces on corners. I agree about the handles, would cover up the awesome graphics. Isn’t it crazy how hard it is to find yardsticks now?
You could put stiff short rope handles on ends if you change your mind later. ( I’ll make something then later think of some little thing I want to do to change it just a little.)
A little imperfection? it’s handmade, it’s not meant to be perfect, perfect might be machine made by a robot. Nobody else might even see any little “imperfection”, it’s just that you strive to make things as well as you can. Enjoy your summer
Oh my goodness, Tricia ~ I love this. I’m going to keep my eye open this summer for some old yardsticks. Hopefully I find some and can make this…..great project!
Thanks so much for sharing at Project Inspire{d} ~ pinning to the party board.
Hugs,
Mary Beth
That’s adorable, and I admire your commitment to getting the yardsticks collect over a year! Wow!
What a super cute and creative idea I love it. I would love for you to link this up to my 170th Inspire Me Tuesday party that is still ongoing. – -http://www.astrollthrulife.net/2013/06/my-15-frenchy-chair-redone.html Hugs, Marty
Love this Tricia! It’s so cute…and imperfections and all. That’s called ‘character’ . 😉
Nancy
Thanks, Nancy! I’ll take character over perfection any day!
I love, love, love it! I love vintage yardsticks to begin with and you made shine!
Thanks so much for sharing your creative project!
~Kim
so so cute! I love taking vintage things and giving them a new life!
I’m so glad I found this tutorial (on CraftyPod). I have a small collection of vintage rulers that I have been hoping to find a use for.
I am such a sucker for trays and love love love this! Worth the year wait! 🙂
Wow. This is amazing. I’ve been saving my ‘sticks for a while now. Can’t wait to try this. Thanks for sharing your process. Love the clamps. Now I feel like I can do this! p.s. I’m scared of the saw, too.
Definitely a keeper! Imperfect is the new perfect 🙂 I just picked up an aqua vintage yardstick…wish I could find more so I could make a tray out of it….I’m tempted to get some new ones and stain them cool blues and greens and make it anyway. Thanks for the tutorial!
Looks great, love it Tricia. You are so clever!! Wish I had your talent!!! Love everything that you touch!!!!
Ronda sent me over, and I love this very first project of yours! I think imperfections are a character plus! Such a lovely blog you have. I’ll be back often.
Your yardstick tray is adorable! I just found your blog through Southern Hospitality and your house is a real treat to tour! I am also your newest follower! I would love for you to stop by my blog sometime at http://homeandlifestyledesign.blogspot.com
I just did a post on a lake house tour you might enjoy.
Thanks, Patty
Hi Patty! So glad you stopped by! Wow, that lake home is jaw-dropping-gorgeous!
YES! Sometimes, it has to be “good enough”… otherwise I think we would make ourselves crazy. I think it’s perfect. If it really was perfect, it wouldn’t be nearly as flavorful!! (Loved the tours at Rhoda’s too. Eek!)
I agree! And it takes all the fun out of making things when you don’t accept the flaws. Just like with myself…I don’t have flaws, I have character. 😉
It looks amazing Tricia! I love this tray….wish I could find a fabulous collection of old yard sticks like this!! Great tutorial, as always!!
Krista
Hi, Krista! I guess we can blame Pinterest for making it hard to find them. 🙂 Ebay, by far, was the best deal.
Love this project! I’ve been seeing projects all over the internet with yardsticks. Yours looks fabulous. Thanks for the easy to follow tutorial!!!
Thanks, Christy!
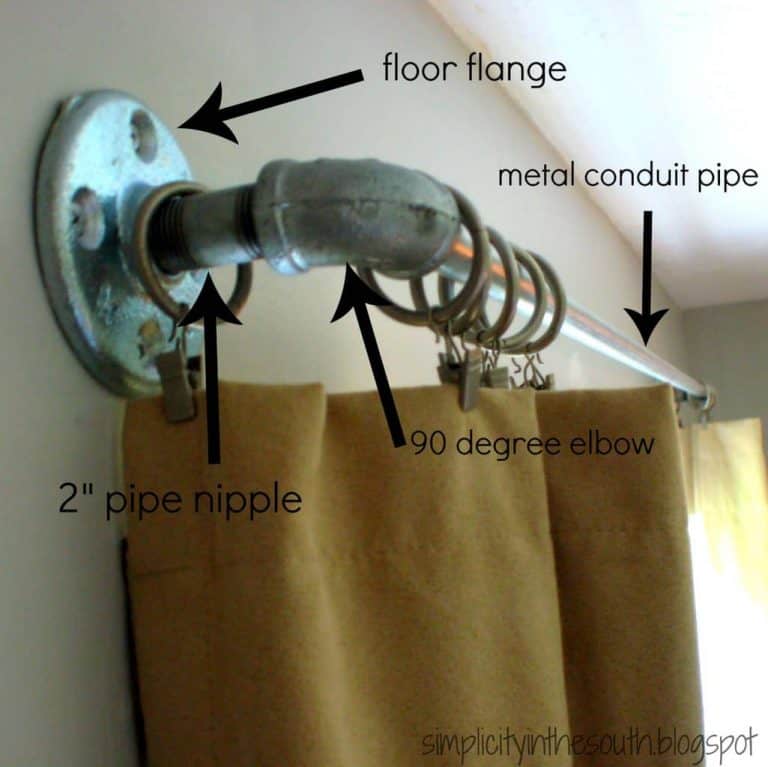
Tricia, I’m coming over from your feature on Southern Hospitality! I love your tray, and sometimes I see vintage yardsticks at an auction that I attend. Now I will snap them up as soon as I see them! I also checked out your laundry room post because I have been thinking about hanging some curtains in ours (to hide the ugly!) You are incredibly organized and you have inspired me to tackle some of my junk!
Hey, Jane! Yes, those tension rods and curtains work great to hide the uglies although I’m a little less organized now than when I took the pictures. I need to purge some paint, in the worst way. So glad you stopped by! And congrats on winning the gaslogs from the giveaway over at SH!
Tricia, love your tray! Now you have me wanting to make one. 🙂 Thanks for the detailed tutorial showing how you created it. I need to buy some of those cool clamps, could so use some of those. Hope you link this up to our Metamorphosis Monday party on Monday…what a great “Before and After!” Have a wonderful weekend!
Hi, Susan! Thank you again for the inspiration! I’ll be sure to stop by on Monday!
What a great way to use yardsticks Trisha! Congratulations on your “shout out” at Southern Hospitality.
Thank you, Gretchen! I’m so glad you like the yardstick tray!