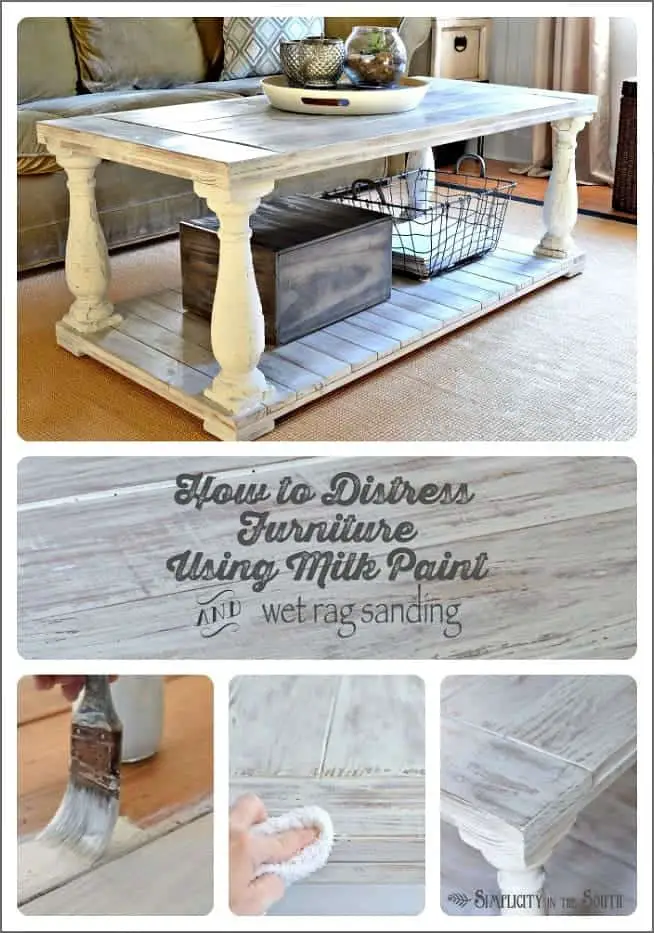
How to Distress Wood Furniture with Milk Paint and Wet Rag Sanding
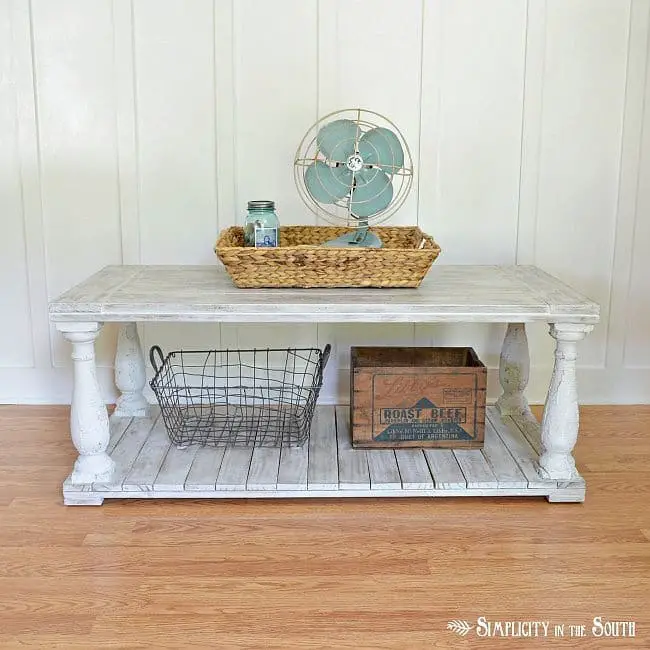
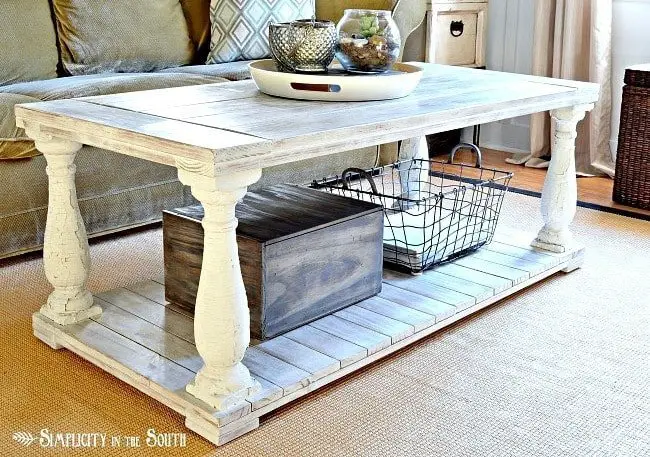
Thanks for all the sweet comments on my balustrade coffee table! I think it’s the beginnings of a (good) addiction.
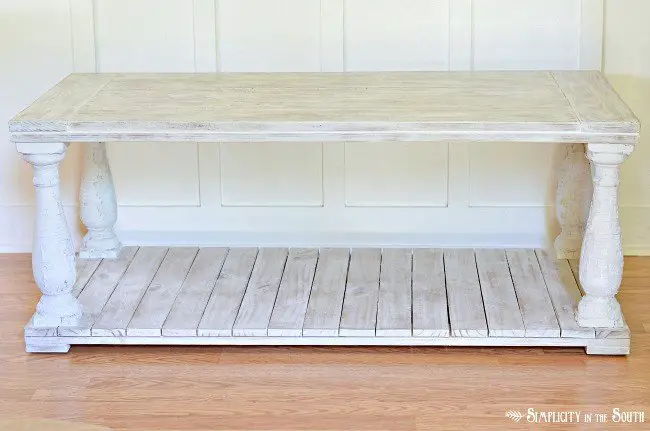
Click the following link to see how I made the knock-off Restoration Hardware balustrade coffee table for about $50 in supplies.

As promised, I wanted to show you how to distress wood furniture with milk paint and wet rag sanding.
It’s a technique that I’ve never heard of until I went to a painting class at the Haven Conference in August. Maybe I just live a sheltered life, but I never knew you could “sand” with a wet rag instead of sandpaper.
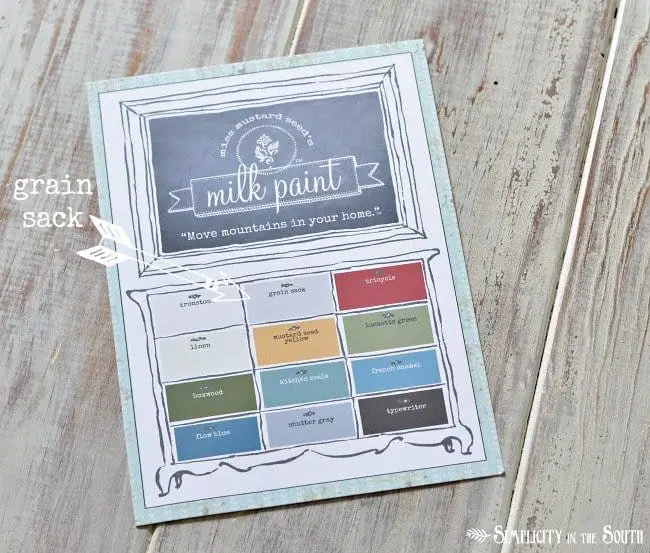
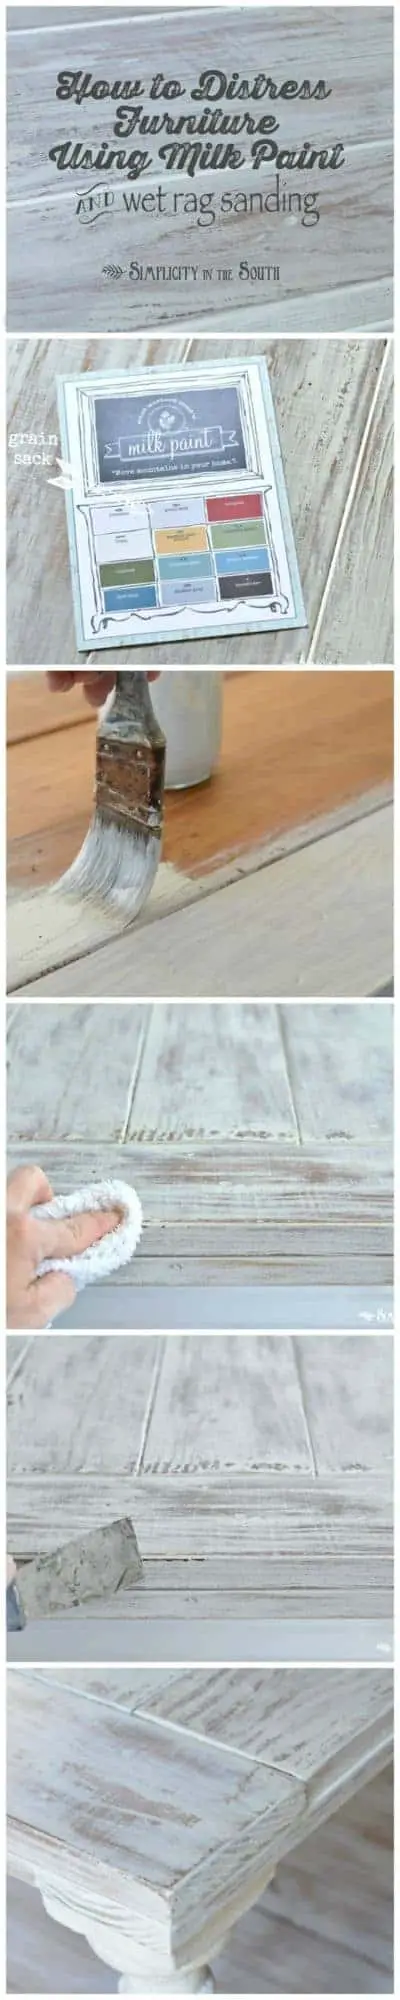
The paint I chose to try it with was Miss Mustard Seed’s Milk Paint in Grain Sack.
If you’ve never worked with milk paint, I recommend heading over to Miss Mustard Seed’s blog and watching her painting video tutorials. Her easy to follow tutorials go over everything from mixing the paint to how to get the chippy look.
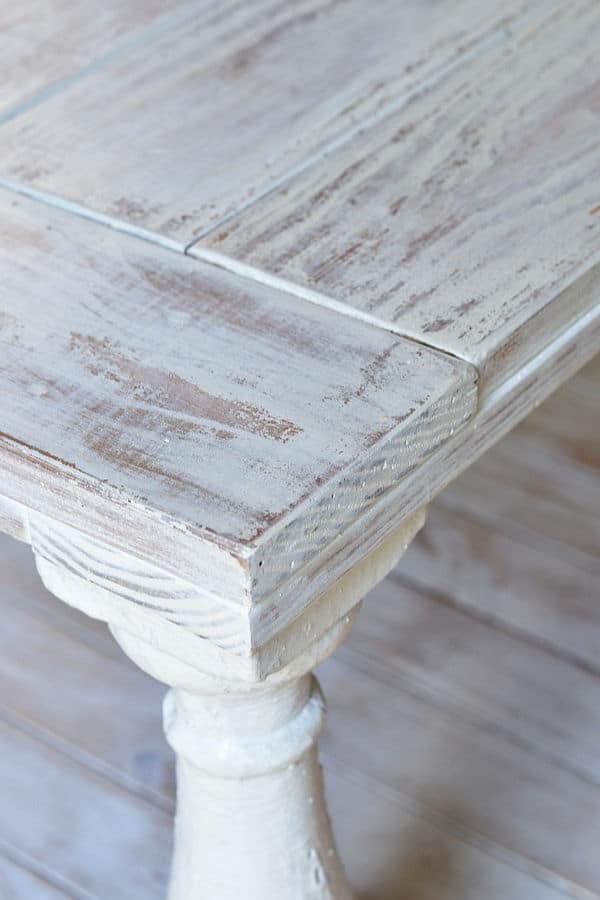
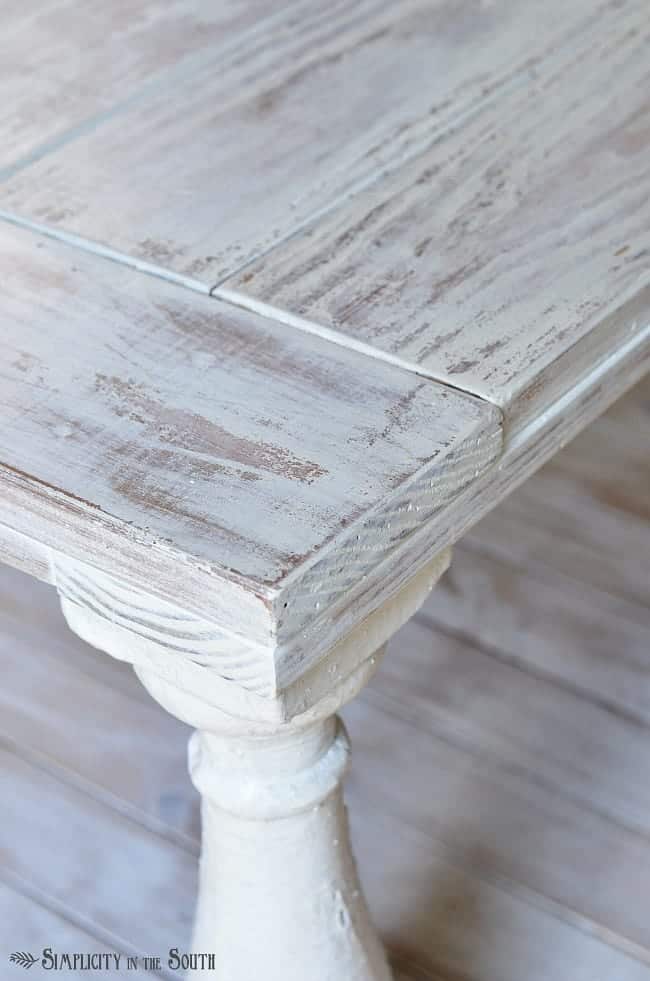
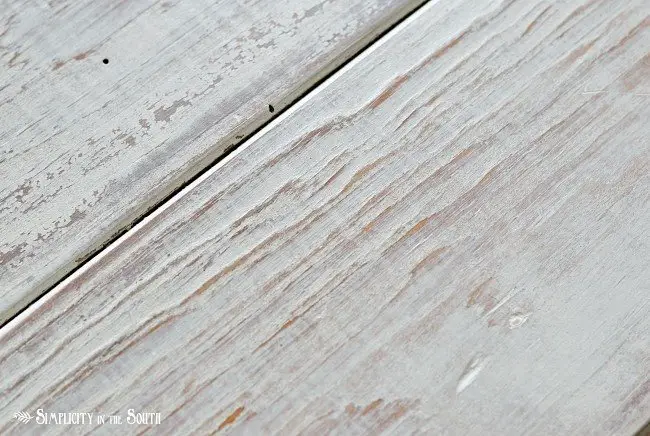
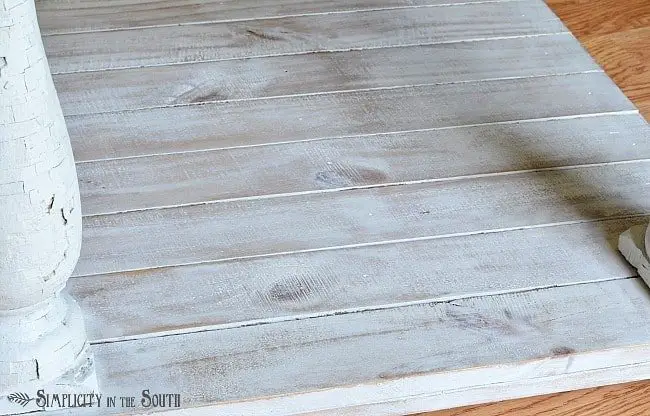
The finish I ended up with reminds me of whitewashed or lime-washed wood.

The Benefits of Using Milk Paint
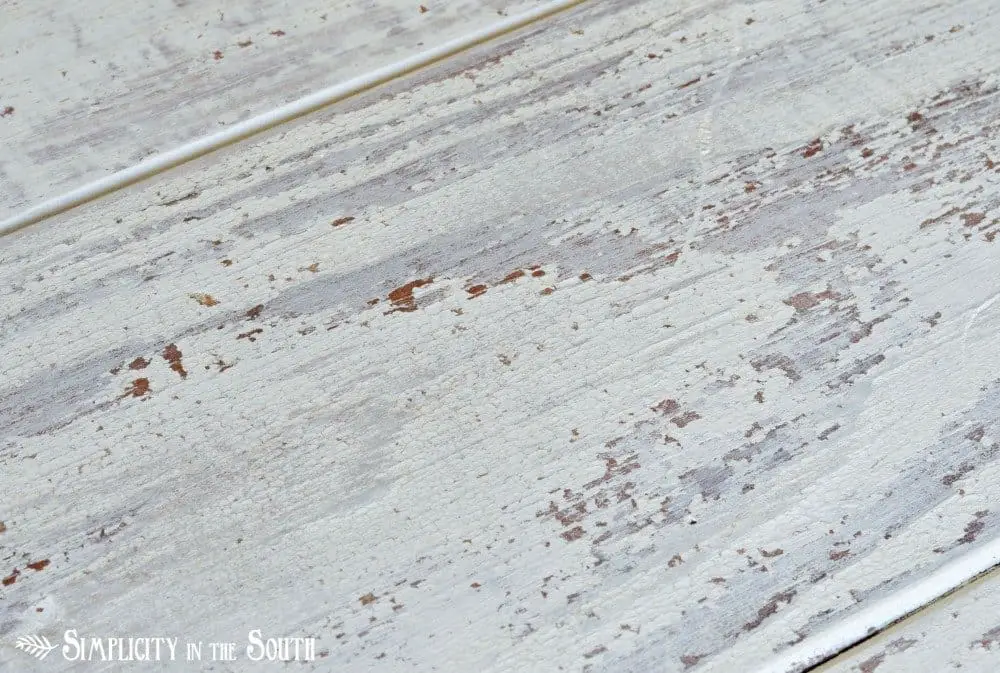
Since milk paint gives you that well-worn chippy, shabby-chic look, the result is a beautiful combination of layered, crackled, and chipped paint.
The best part about this technique is that it’s easy.
There’s no dust from sanding to clean up. And unlike whitewashing that requires working in sections and timing it just right, this was just a process of putting the paint on, letting it dry completely, then wiping it off till I got enough of the wood grain to shine through.
Stain the wood furniture first
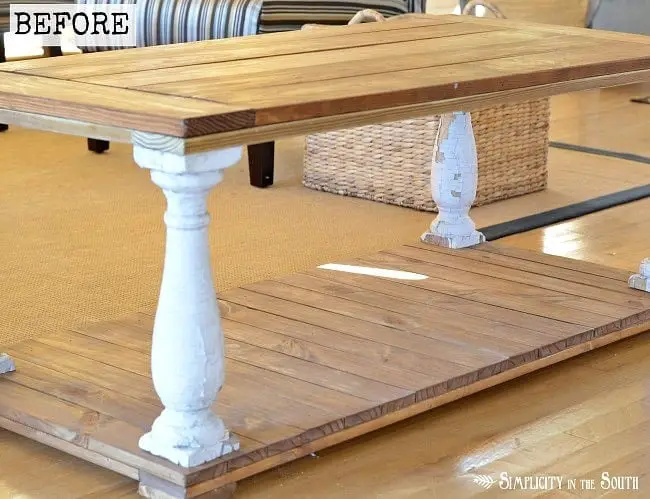
I started with a table that had four different types of raw wood. There was aged pine, new pine, new fence boards, and painted balusters.
The first step was to stain the new wood with Minwax Special Walnut. Then, the old pine was stained with a 50/50 mix of Special Walnut and Golden Oak. This way, what shows through after distressing has similar wood tones. The stain dried overnight.
You won’t get the same results if you skip the wood stain and put the milk paint directly on raw wood. The paint will just soak into the porous wood.
If you’re using milk paint on a previously varnished piece of furniture, you’ll need to give it a light sanding and wipe it down with TSP to keep the paint from chipping too much.
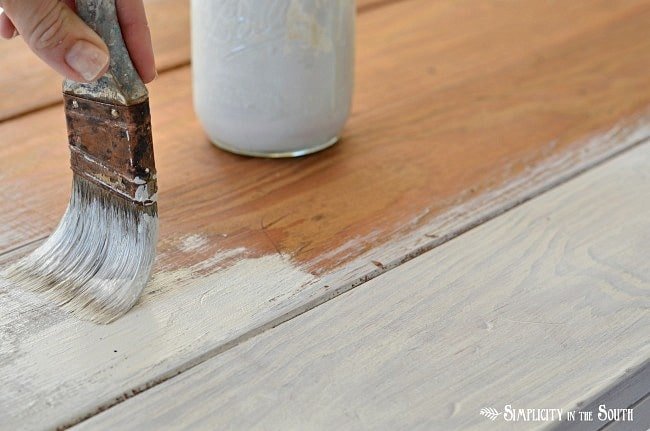
Painting with Milk Paint
Next, I mixed the milk paint with water according to directions and gave the table two coats of paint. I also touched up the balusters.
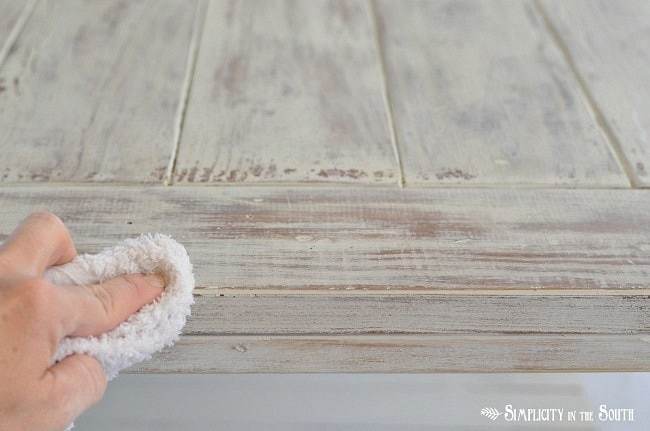
Distressing the Wood with Wet Rag Sanding
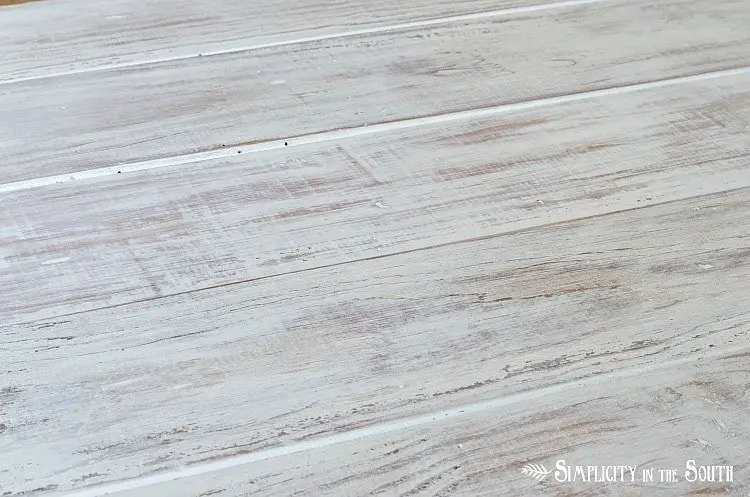
After the table was completely dry, I began distressing with a damp washcloth.
The mistake I made was starting on the top of the table instead of working from the bottom up. You want to avoid drips of water or your paint will come off unevenly.

The biggest drawback to wet rag sanding is it takes a little more elbow grease than using sandpaper.
If I wiped down a section a few minutes before I worked on it, it made it easier to remove the paint.
It was also easier if I wiped some areas against the grain of the wood. I love how the raised grain is highlighted on this part of the table.
Any areas where too much paint was wiped off or where the chipping was too pronounced got dry brushed.
To dry brush, wet just the tips of the bristles with paint, dab most of it off on a paper plate and lightly brush the paint on.
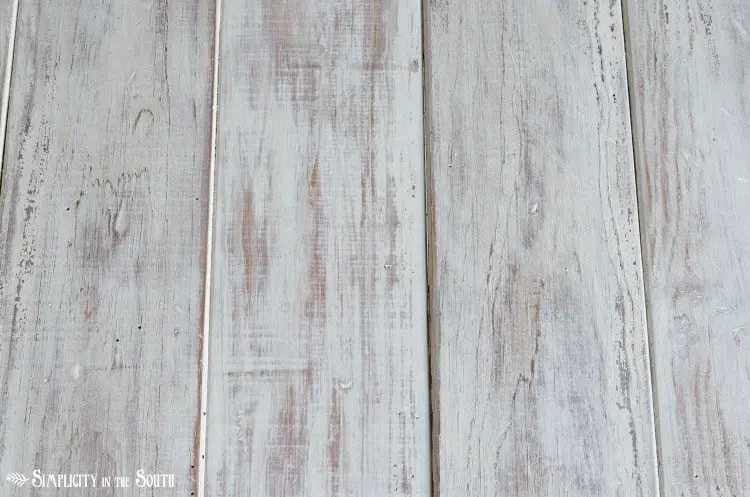
After that, the fence board slats on the bottom of the table were distressed the same way.
Sealing and Protecting Your Finished Work
Once the table had time to dry completely, I gave it two coats of furniture wax. I sealed the balusters with polyurethane.
Update: (04/03/17): After living with the coffee table a few years, I decided to remove the old wax with mineral spirits. Then, I repainted the top using the wet rag distressing technique with the milk paint and recoated it with a flat polyurethane.
I was having to reseal the tabletop with wax a few times a year so this should correct the problem and give the coffee table a much more durable surface. If you plan on using this paint technique on any furniture that gets heavy use, I recommend using polyurethane instead of wax.
If you found this tutorial on how to distress furniture with milk paint and wet rag sanding helpful, then please pin this idea for later! To learn more helpful tips on furniture painting and renovation, check out this article on Porch.com.
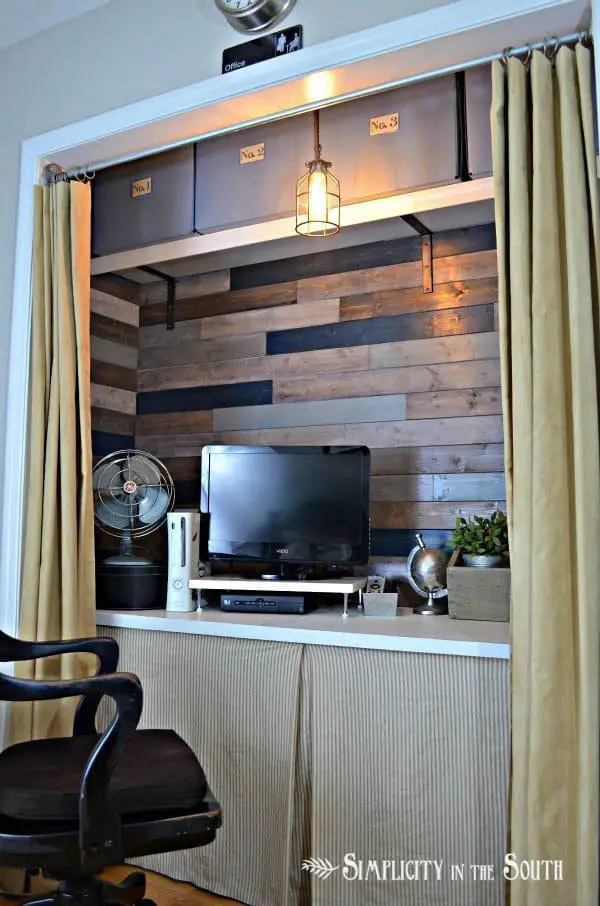
If you like the whitewashed look, I have a tutorial on how I used that technique on our son’s planked office-in-a-closet walls.
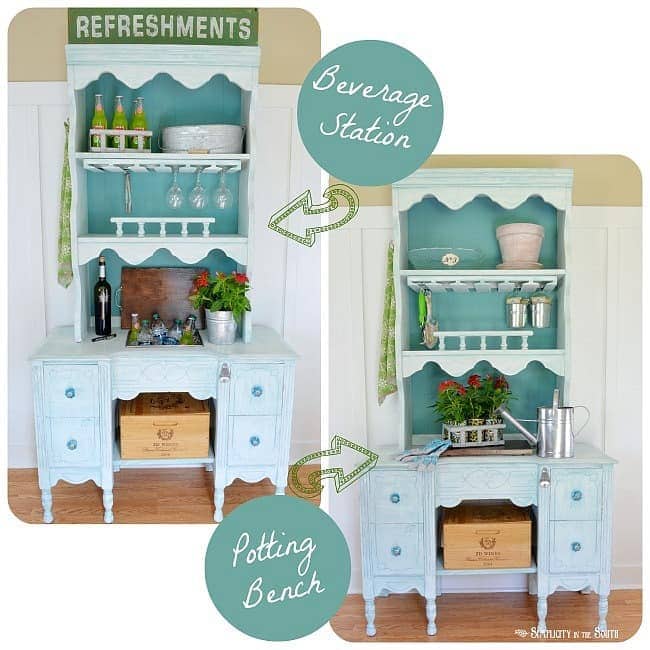
And I did a “blue wash” on this repurposed hutch and desk that were turned into a beverage station / potting bench.
Have you ever heard of distressing furniture with a wet rag, or am I the only one in the dark? 🙂


Great guide! Thank you for sharing your knowledge. Looking forward to more DIY tips from you.
Hello,
I am woking on my kitchen table right now. I was told to use a WAX with the chalk paint. I am scared to use a polyurethane (even a water base paint) because I did on my daughter’s white painted wood floors and they turned yellow! 🙁 After all that money and hard work – they are ruined and yellow! I will have to redo them at some point.
My question is how is your table now after all these year after using the polyurethane ?? is it still white or did it turn yellow?
I haven’t had any yellowing with the coffee table but I’ve learned over the years that you can have yellowing due to the tannins of certain woods, even with a wax topcoat. It can also happen if there’s any existing varnish that wasn’t primed or sealed before applying chalk paint. When the wood isn’t sealed first, tannins can bleed through and it won’t matter how many coats of paint you use it will eventually turn yellow. A quick fix for this would be to get some Zinsser CLEAR shellac in a can. Put two thin coats right over your your current finish allowing each coat to dry for a day (or at least 8 hours). Lightly sand with 220 grit sandpaper after each coat and wipe off all dust then let dry for 2 days. Make sure to allow adequate amount of time for shellac to completely cure before priming or painting or it may cause the paint to crack and peel. Then you’re free to paint your table and seal with the polycrylic once the paint has time to dry completely. Good luck!
wow! thank you for your reply! Very helpful. I wonder if that is why my daughter’s “porch style” flooring i did in her room turned yellow after painting white with porch paint and then a water base polyurethane was applied. Days or weeks (can’t remember exactly) after painting i noticed areas of the floor turning yellow and today the flooring is ALL yellow 🙁 All that work! So, now i have to figure out if i need to sand and repaint or can just paint over with fresh porch paint. Wood was ply wood ripped into ~ 6″ boards.
You’re welcome, Jamie! I meant to put that in the past, I’ve sealed my paint projects with Minwax polycrylic instead of polyurethane. Since I got your comment yesterday, I did a little research to see if anyone else has had the same problem with their painted floors yellowing after using polyurethane. I found this blog post: http://www.allthingsthrifty.com/2012/10/how-to-paint-floor-and-what-not-to-do.html She also used porch paint and topped with a water based polyurethane. She had to repaint the floor and topped it with a water based polycrylic which she found hasn’t protected it very well. You can read through the comments to see how her floors have held up and other folks experiences using polyurethane over painted floors. A blogger friend of mine, Nancy at Artsy Chicks Rules, swears by Varathane Floor Finish (also found at home improvement stores) for her painted projects. This Varathane claims to be non-yellowing but I’m not positive that means over porch paint. Here’s the link to her white kitchen cabinets that she sealed with the Varathane. The post was written 6 months after she painted and it hadn’t yellowed. I don’t think that you’ll have to sand the floors all the way down to repaint. A light sanding should be all it takes. I’d spot prime any places that look like the wood knots are showing through with a white shellac primer. Since the floors may have residual floor cleaner on them, clean them with diluted TSP and then put a coat of white primer over them before repainting them with an enamel based porch paint. Since porch paint is made to be durable enough to be walked on with out a sealer, you might be able to get away with not topping with poly. If you want to use poly, test an area topped with the Varathane that gets sunlight to see if it yellows. I wonder if it’s just incompatibility with the paint and the poly. I know this is a long winded reply but I hope it helps you with your floors. I learned a little myself since I’m wanting to paint my laundry room floors one day. 🙂
I have oak chairs that are stained not painted and no sealer or varnish. Can I use this technique on them without a lot of prep work and still get a similar result. I do not want to have to strip them……maybe just a light sanding would be enough? love your finished look!
Thanks so much, Karen! Yes, you can try a light sanding with a 220 or higher grit sandpaper. I’d suggest trying the technique on a leg to see how it looks before you get started. I’m excited that you’re trying it out on your chairs!
Hi, I’m hoping I can get some help and info. Very quick on me… just moved into a new house, had all our things in a non climate controlled storage unit for 3+ months, found out things had mold on them. Clean off my very old kitchen table but now it looks like crap. Looking into milk painting it. But wanted a recommendation about how to seal it. What to use… I’ll need to wipe it off after my 3 kids eat. Lol… just wanted to see if anyone had any thoughts or suggestions. Thanx
I am thinking of using this technique on a round oak dining table. I am concerned that I can’t seal the table top after waxing. Is this true? Would love your opinion. Thank you!
What would you do if the table was dark like almost cherry wood? Thanks !
Is there a way to do this to a table that is already stained and shiny? It is a very flat surface with no wood grain popping up. I love this look!
I LOVE this idea! Have wanted to create the whitewashed look on some projects I’m building, but have been afraid of all the work…this seems much simpler and the outcome is terrific!!! I do have one question though: I plan on using this technique on pallet wood (which is obviously not treated/stained/etc.) I have done some light sanding on it, but not too much, as I like the more rustic, “not perfect” look. Would I need to do anything to the wood before applying the milk paint? Have you used this technique on that type of wood before?
Any input is greatly appreciated. Thanks so much!
Tricia,
I was refinishing an old dresser from Goodwill and was not pleased with the way the milk paint looked. I wiped some off to start over and found I really loved the look. My piece looks a little like driftwood. I was going for a beach cottage look so was perfect. You just learn to work with your particular piece of furniture. Who would want them all to turn out the same, unless you’re a furniture manufacturer. I truly love milk paint for its incredible versatility and surprises.
The only other thing I think is that a piece needs to have a raised grain, not a smooth surface, to obtain a good look with the wet rag rub-back.
Beautiful table. acan you tell me what you used for the legs and where you got them?
I have candlesticks that I bought several years ago that are distressed white. I want them a distress black. Can I use this technique with them after I sand them down some?
Wow, what a beautiful table. I love what you did with this. I am so excited to try this on a dresser.
Just a short tip for you. You can use the sanding sponges with water and they work great. They sand a little faster than with a rag and you get great results in less time.
Love this look! Your coffee table is gorgeous! Pinning for later.
Gorgeous!!
Would chalk paint work this way as well?
Thank you, Laura! Yes, you can use chalk paint instead. The result won’t be chippy like what milk paint gives you but you still get the whitewashed effect.
After hours of Pinterest searches, I finally found your tutorial and I’m in love! I do have a question though. The table I’m hoping to transform has a polyurethane finish. I am planning to do a light sand as you suggested. You also suggest wiping it down with TSP; what exactly is TSP? Is that a bonding agent? Thanks!!
Thank you, Leona! I’m so glad you found my tutorial. TSP, also known as trisodium phosphate, is a degreaser. You can use mineral spirits instead. Hope that helps!
Hi Tricia! Did you use one or two coats of the min wax stain?
Hi, Susie. I used one coat one the reclaimed/older wood. The new wood needed 2 coats to make it look closer to the tone of the older wood.
Tricia, did you get your milk paint at Palmetto Home and Garden? I heard they sell it and Annie Sloan. Also, have you tried the chalk paint too? I want to paint an antique table, and I’m trying to decide which of these types I want to try.
Thanks 🙂
I love the balustrade table. Where did you find the balustrades?
I bought them from Southern Accents, an architectural salvage dealer out of Alabama. You can sometimes find them on Craigslist, Ebay and Etsy.
Tricia, Thanks for the shout-out. I love this table and will be pinning it to my white decor pinterest board. I also love the basket and staging of the table. I find that if I do the wet distressing just after the paint is dry that it is easier. Sometimes I only wait a couple of hours after painting to wet distress. Also you might try using those wet paper shop rags out of the pop-up tube. They have a cleaning agent on them and the paint comes off easier. It is hard work getting that paint off. Have a great weekend!
Great tips, Kathy! I’ll definitely give them a try. Thanks so much for the surprise that came with my shipment. Can’t wait to try it and I’m really looking forward to using the Boxwood color.
Love this! You did an amazing job! Do you have a tutorial on making the table? I’m in desperate need of a new coffee table and want a DIY project. Would love to know more!
Hi Kimberly! I sure do! Here is the link to the tutorial: https://www.simplicityinthesouth.com/2013/09/restoration-hardware-knock-balustrade-coffee-table.html
Thank you for the compliment and I hope you get that new coffee table soon. 🙂
What a cool technique and the results look great! I definitely want to try this sometime. BTW: Love your table!!
I didn’t know you could do that with milk paint. That’s handy to know if I ever order some, great tip!
I’m glad I wasn’t the only one. 🙂 Your kitchen looks great. Love those wood countertops!
Hi again Tricia!
Saw you posted this to Miss Mustard Seed. I had to like it…just love this finish and I can’t wait to try it out on something!
Debbie
What a GORGEOUS table! I will have to keep an eye out for balusters like those! Wow!
Thanks Erika! I’m already shopping for more. I have a friend that wants me to build her a table. Hope you find those balusters!
Hi Tricia, I really enjoyed this post …..love all the painting tips and the color you choose. I have an Armoire in my Playroom that I’ve been meaning to paint. It is made out of Pine Wood and currently has a wood stain (no paint). I am wondering if I could email you a picture of if? Perhaps you could tell me if I can just go over the existing stain with the Miss Mustard Seed Paint???? Christine from Little Brags
Sure! You can email the picture to Tricia @simplicityinthesouth(dot)com. Glad you liked the post!
Thank you so much for the tutorial! I’m loving this finish! Great job! 🙂
You’re so welcome, Shayna! Thanks for the compliment!
ive never heard of doing that either! i absolutely love the way this looks! heres a confession on my part…. i just finally FINALLY bought some ascp. milk paint is up next (hopefully it wont take me 3-4 years…lol!). anyway, ive been wanting to redo my kitchen table and i think this might be the perfect technique to use. you always inspire me. 🙂
Thanks Carla! Coincidence…I’m going to be painting my kitchen table soon too. I have oil based paint on it now and it’s not holding up like I hoped it would. I just have to do some research and see which paint and wax will work best. I’d like to use milk paint, but I know I’ll have to do some light sanding and use a bonder to keep it from chipping too much. I’m having the hardest time deciding on a color!