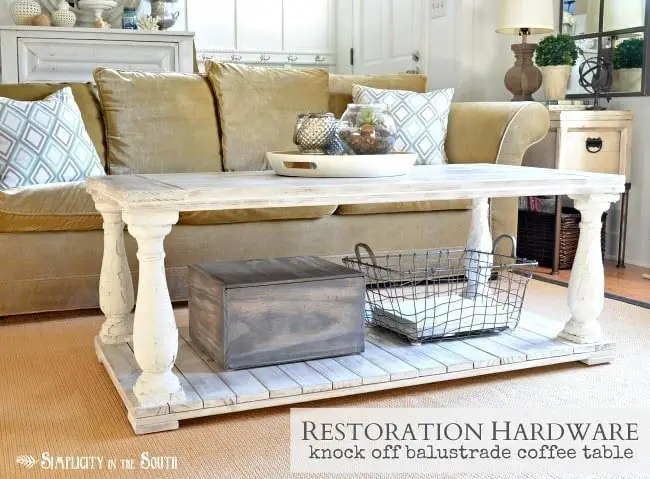
Restoration Hardware Inspired Balustrade Coffee Table
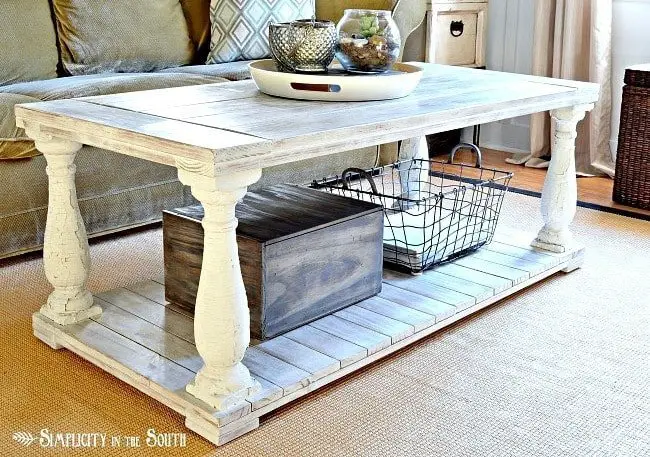
After living with our small and wobbly coffee table for the last ten years, it was time for something more substantial and beefier. I’m thrilled with how our new coffee table turned out and even more happy that I was able to build this DIY furniture for $50.00 in materials. Most of the wood I used for this project was given to us by a friend.
 I’ve already proclaimed my love for Restoration Hardware knock offs with this RH inspired aged metal Ikea cabinet and this DIY industrial pendant.
Inspired by their Salvaged Wood Balustrade Coffee Table, I went with the dimensions of the smaller scaled table that is now on sale for $1195, $300 off the normal price tag of $1495. A $1445 savings sounds even better, right?
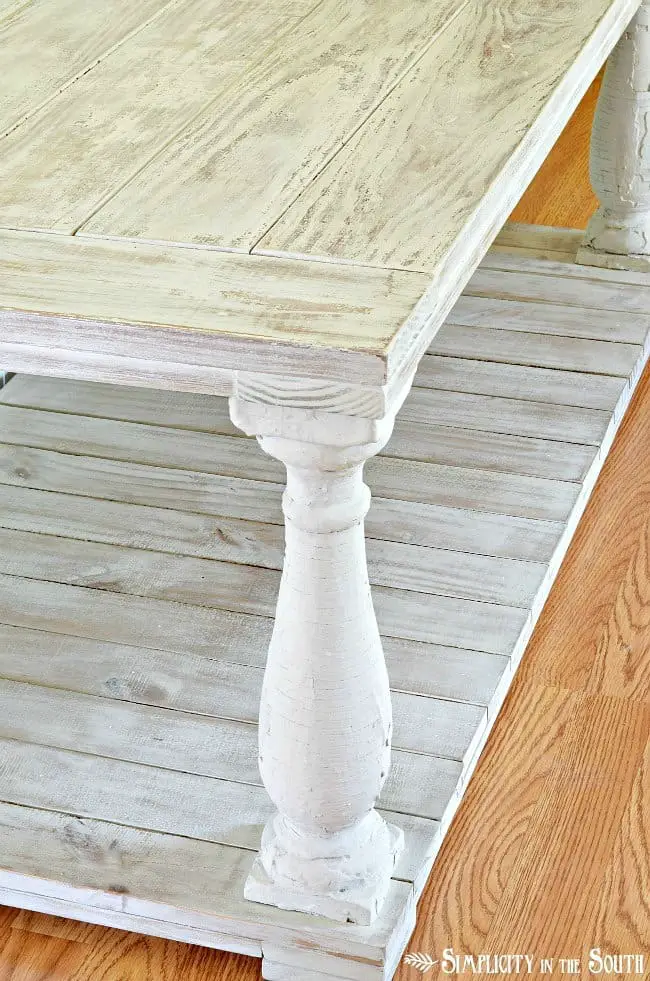
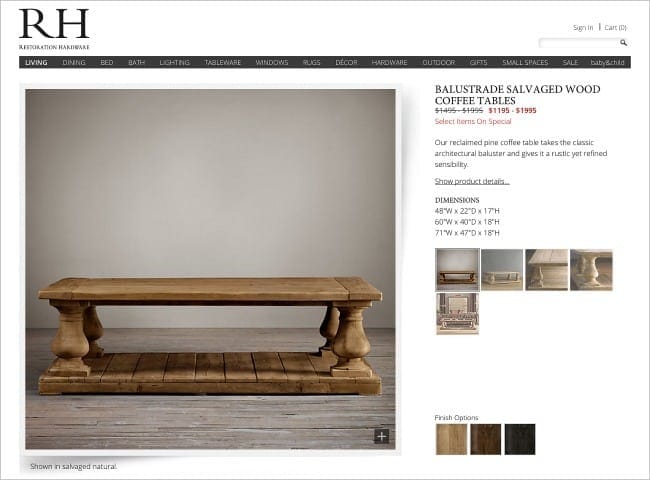 The finished dimensions of my coffee table are 48″W x 23″D x 19″H.
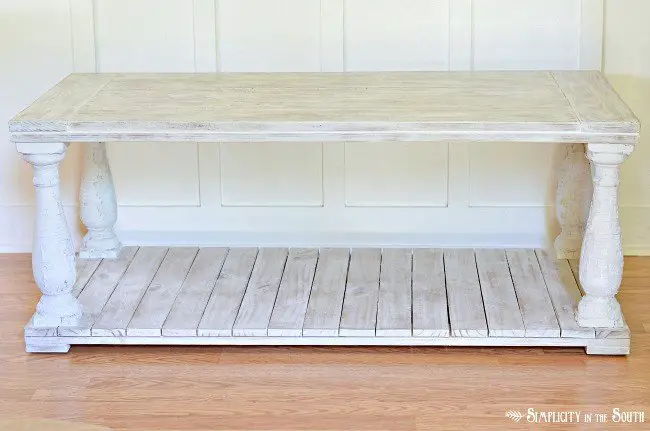
Special note: The lumber I used for the table top looks like it came from door frames and are 1″ x 5″ boards (actual width 4-1/2″). Most home improvement stores don’t stock this size but can rip down 1″ x 6″ boards for you.

Tools & Materials for building the RH knock off Balustrade Coffee Table:
(I added Amazon links to the products I used and recommend.)
(3) 1″ x 5″ @ 8′ long
(4) 1″ x 4″ @ 8′ long
(3) 5 1/2″ (actual width) @ 6′ long fence boards (ripped down in half )
(4) 3/4″ furniture sliders with screws
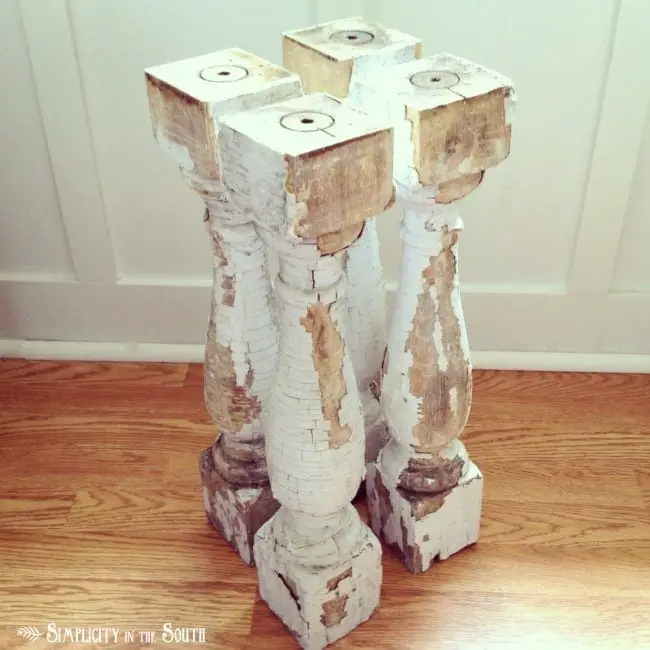
(4) 4 1/2″ diameter balusters (Mine had to be cut down to 15″ high)
Miter Saw
Kreg Jig and 1-1/2″ Kreg coarse screws
Kreg Face Clamp
Bar Clamp
Power Drill
Impact Driver
Wood screws- 3″, and 1-1/4″
Sandpaper
Palm sander
Block Plane (optional- you can round off the board edges with a sander instead)
Hammer
1- 1/4″ brad nails
Wood Glue
Wood Filler
I found my balusters at the Southern Accents / Lucy’s Inspired booth during the Haven Conference for $40.00. I carried those chippy beauties out of there like they were my babies. Quads, no less.
Just to be on the safe side, I tested them for lead using 3M’s Leadcheck swabs.
Instructions:
**Don’t forget to protect your eyes, ears and lungs with the proper equipment before you start your project.**
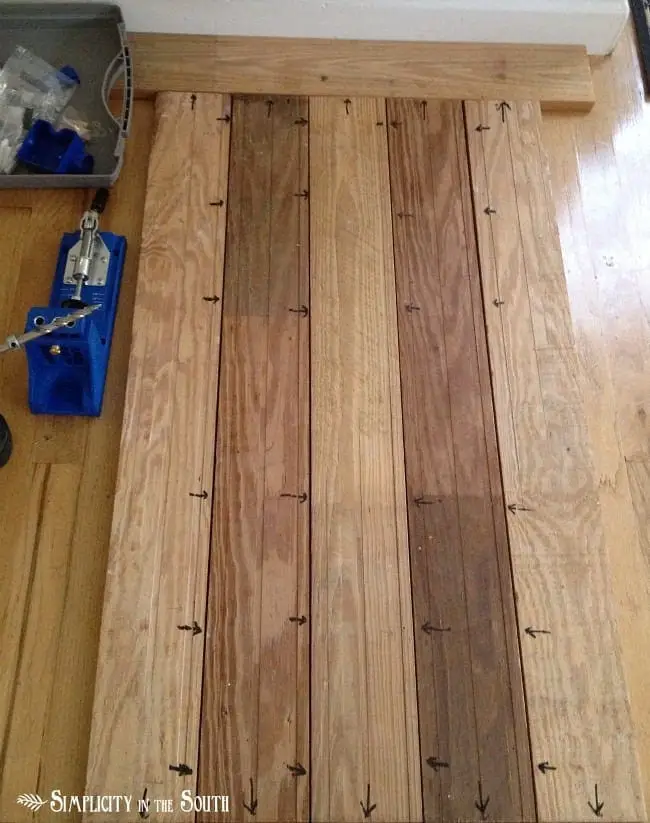
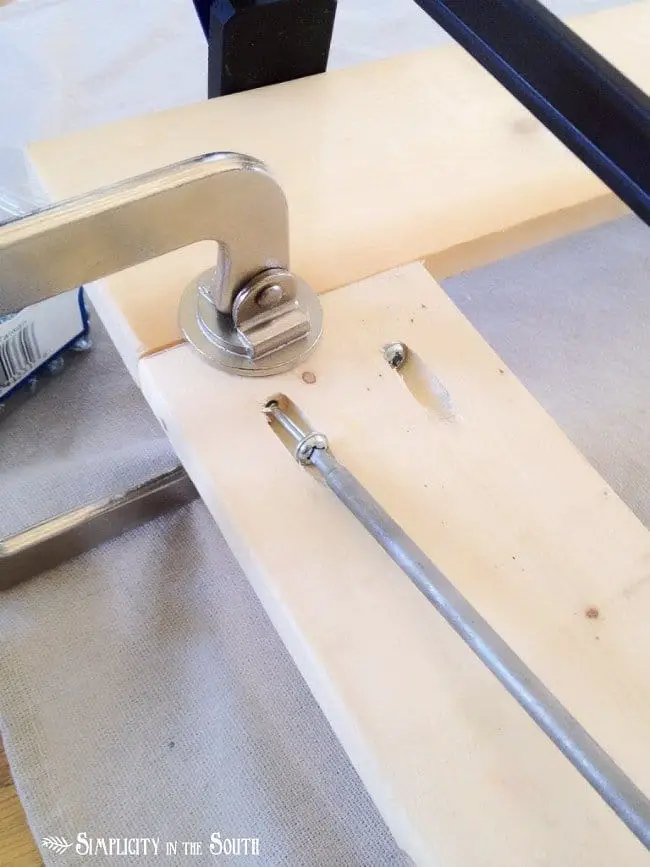
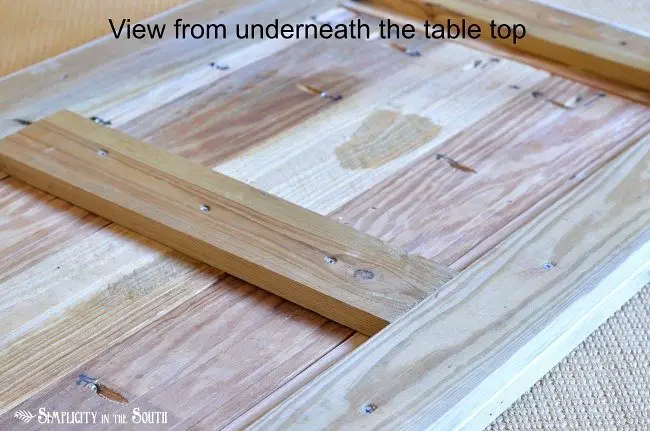
I used the Farmhouse Table Plans, steps 6 and 7, from Ana White as a guide to build the table top. I cut the 1″ x 5″ boards and joined them together using the Kreg Jig to make pocket holes and 1-1/2″ Kreg screws. The picture below shows where the pocket holes will be made. The length of the end pieces, called breadboards, are determined once the long boards are joined together. The finished table top measures 48″ x 23″. Cuts using 1″ x 5″s: (5) 39″ boards and (2) 23″ boards.
At this point, I knew the exact measurements of the table top, so I made a base in the same size. I cut the 1″ x 4″ boards and joined them by making pocket holes with the Kreg Jig. Cuts using 1″x 4″ boards: (2) 48″, (2) 16 1/8″, and (1) 41 1/4″.

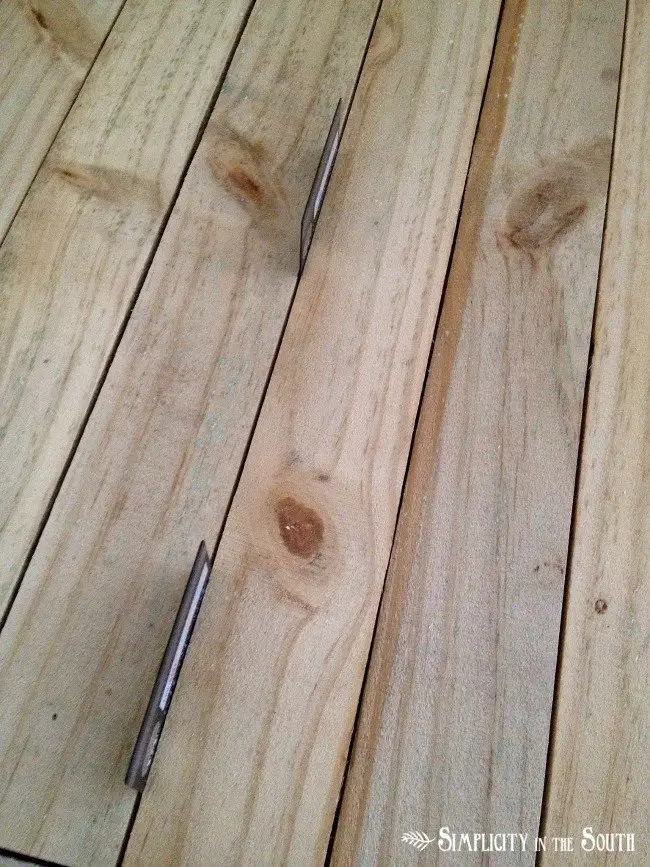
Fence boards were ripped in half then cut down to the width of the table. I nailed them to the base and used credit cards to keep them evenly spaced apart. Cuts for the fence boards: (17) 23″ long
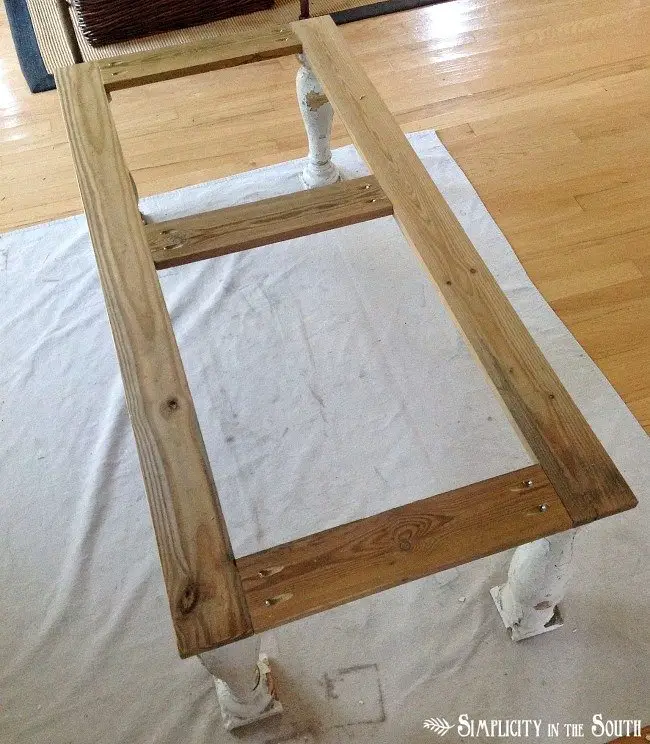
The table top has a supporting frame underneath. It also measures 48″ x 23″. This gives you a place to screw in the balustrade legs. It was screwed together using pocket holes. Cuts for the supporting frame using 1″ x 4″s: (2) 48″ and (3) 16″.
Once you check that everything is level, you can pre drill the holes and attach the baluster legs using 3″ screws. An impact driver makes this job a whole heck-of-alot easier. It allows you to drive the long screws in easily without stripping them. Since you have more torque without stripping the screw, you can countersink them. Um, and yes, make sure the legs are all turned the right direction before you attach them to the frame.
The supporting frame was attached to the table top from underneath using wood glue and 1-1/4″ screws.
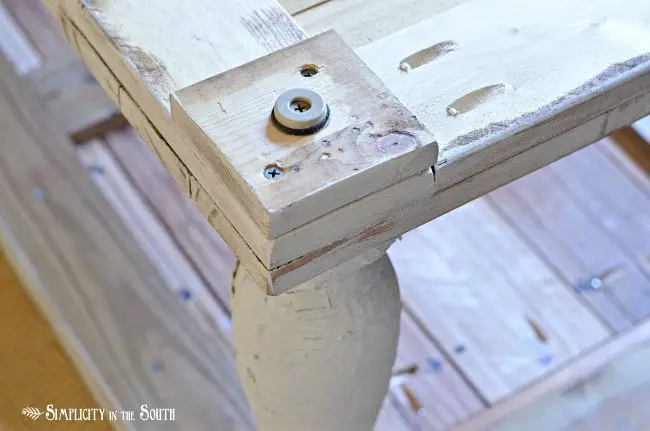
The baluster legs were screwed in from the bottom with 3″ deck screws. Again, pre drill your holes.
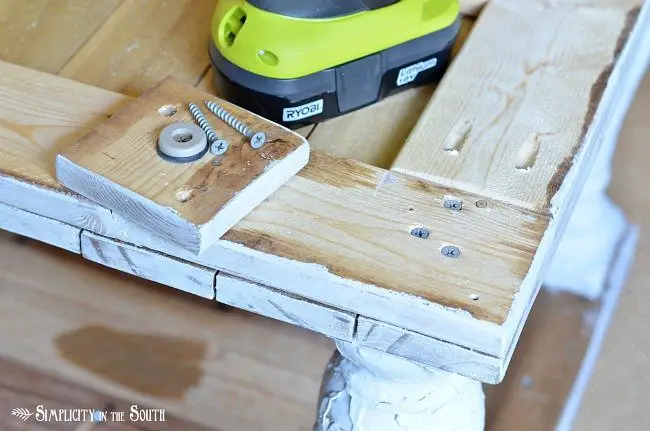
I attached feet cut from 1″ x 4″s to the corners then added furniture sliders to protect the rug. Cuts from 1″ x 4″ boards: (4) 3 1/2″ squares.
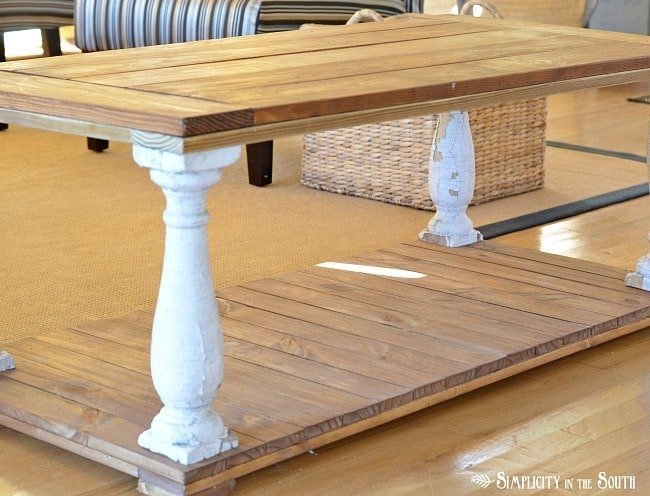
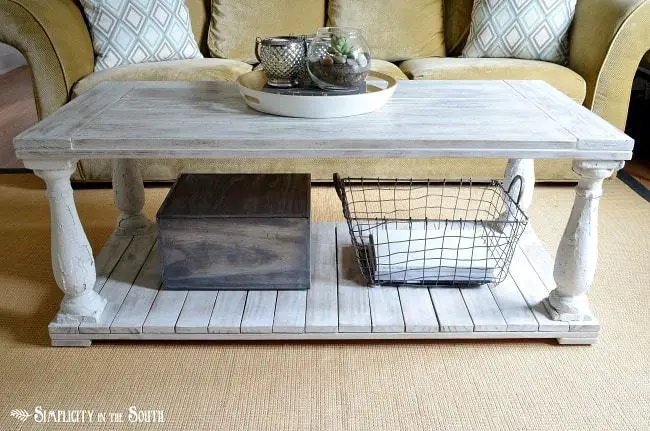
And here she is, all put together and ready to be painted.
 Click this link to see how I painted and distressed the coffee table. It’s painting technique that I haven’t tried before now and I’m really excited about sharing it with you! The lighting makes it look two different colors in the picture, but it’s all the same in person.

I have to admit, I was feeling a little intimidated since this was my first DIY furniture build and I didn’t have any building plans to go with it. But, it turned out much better than I thought it would.
So, tell me, if you could knock off a piece of furniture from any catalog, what would it be? I’d love to hear what you have to say.
Check out these other Restoration Hardware knockoffs that’ll knock your socks off:
- Restoration Hardware Inspired Faux Aged Steel Ikea Cabinet
- Industrial Cage Pendant Light Inspired By Restoration Hardware
- Cheap & Easy Wooden Poster Hangers & RH Inspired Lithograph Maps
- Knockoff Restoration Hardware Bristol Flat Mirror

Starting today, Beckie of Infarrantly Creative kicks off a week-long State Pride tour where 30 bloggers share a project that represents their state. I’m proud to say that I’ll be representing South Carolina tomorrow. See you then!


Thank you Tricia! I finally found the design for my platform bed. I’ve been looking for about three weeks for something that I love and I now found it. I’m going to use six of the legs and make it a platform bed for me:)
which are your favorite new musicians you’ve heard about these days?
I just found your blog and love your projects. This coffee table is stunning and absolutely love it. I also loved your idea in your hallway makeover with the ductwork vent. Where did you find the radiator metal sheet? I would love to update mine.
Again, love your projects!
Very soon this web page will be famous among all blogging and
site-building people, due to it’s fastidious articles or reviews
I am just now getting deeper into woodworking; I have only completed a few projects but I feel so intimidated after seeing this masterpiece. I love how the table transforms the look of the room. And for 50 bucks? Outrageous!
Thanks for posting the tutorial – I will be making my own soon – I will send you pictures – you’ve inspired me 🙂
Ummmmmm . . . this is AMAZING!!!! And your first build?!? I must have one. Thanks for the inspiration!!
Wow – this is amazing!!!! love it!
Tricia, it is GORGEOUS! You did an amazing job! Those balustrades are perfect!
love your coffee table! GORGEOUS, and I would love to feature it, if that would be ok please let me know,
lauren
Gorgeous coffee table Tricia! Great tutorial too! Your talent blows me away! Pinned! 😀 xo Heather
The table turned out amazing. I love how you styled it too. I am going to poke around the rest of your site. So impressed!
OMGOSH! Your’s is WAY better than the RH one!! LOVE IT!!! GREAT JOB!
WOW I love this!
Thank you, Linda! I appreciate you stopping by!
A seriously A-MAZEing knockoff Tricia – WOW. And awesome tutorial – pinning – a few times!
Thanks for pinning, Krista! I did some pinning myself with your son’s homework station. You know how much I love maps!
This is absolutely gorgeous!!! Great job!
Okay, this is seriously amazing! Love it!
Thanks so much, Laura!
First time visitor to your site (I think). Love it! I was searching everywhere for your paint technique when I realized you hadn’t posted it yet because you just posted this tutorial two days ago! I will have to stay tuned. Love the things you’ve done with your house. Ours is similar and we’re getting ready to knock our kitchen wall out too. Can’t wait!
Hi Hillary! I can’t imagine our house back the way it was. It’ll make such a huge difference. I’ll have the post up in the morning. So, glad you found your way here!
Nice job – I would knock off the Salvaged Wood X Base Table Round – Love it – also RH piece.
You did an AMAZING job! I love the table!
Beauty of a job! Love this table!!
Love love love it!! I want to do that same paint technique on my dining room chairs.
You did an amazing job with those balustrades!!! I love how your table turned out. I posted on Southern Accents Facebook page this morning!!
Super job and great tutorial!
I love this! I think yours looks better than RH version. 🙂 I saw you over on HomeTalk- now following you.
For a first-timer, you’re a natural! Looking forward to seeing more amazing works that you build! 😀
Very nice job! Came over from Pinterest. Yours looks just as good or even better than RH!
You are amazing, I love the way you roll!!!
Mary
Wow, I’m so impressed! What an amazing job you did! I would buy that in a second!
This is a fabulous table! I would love to make a similar style sofa table. I’m very impressed and looking forward to the finishing technique!
Very, very impressive! Can’t wait for your finishing post!
Absolutely perfect. You are amazing. I LOVE this. You knocked it out of the park!!!!
It looks amazing! Bravo and be proud – I am bookmarking this as I too am wanting a new coffee table…now to find some balustrades!! LOVE it!!
This is brilliant! I can’t believe that is your first furniture build! You did a knock out job with it, and it looks beautiful!
Tricia, this is STUNNING! I think it’s better than the RH version, and at a stellar price. Beautiful job!!
That’s the BEST compliment! Thank you, Erin!
Looks great Tricia! The old and new combo is perfect! ~Sonya
Thanks, Sonya! I thought about making the balusters look newer by stripping the paint off but I’m glad I didn’t. I like the combination of new and old, too!
Tricia, you ROCK! What an awesome project. Love that you incorporated some old pieces too. I’m saving this project so I can show my husband. We are working on our kitchen and I want a big island and your table is almost exactly what I had in mind. We have some really old table legs and newell posts saved. Can’t wait to use them! Have a great day!
Thanks, Amber! That kitchen island is going to be gorgeous. I just know it! Let me know when you get it done so I can check it out.
I must caution that salvaged architecture may and likely will be covered in lead paint.
Thank you. I did test test it for lead and explained that in the post.